
My solution?
I'm glad you asked. Here is how I get around zippers, but still manage to access the pillow insert if I need to change the colors of my room for the season or throw it in the wash to freshen it.
Here is how to do it. Make sure you have fabric that is at least 1" longer than the middle pillow seam on both sides. You can make it looser if you want a more casual look or slightly tighter for a crisp look. Just don't make it too tight, it will need room to smoosh when you use it.


Lay out the fabric (right side toward the pillow. Fold over the flap and create the lip of the flap. You can make yours a bit shorter, but I like mine a bit longer to keep it laying flat.

 |
| Diagram of layout |

This is what it looks like (I pulled up the right side to show the inside)

Now, using your serger or regular machine just sew the two cut edges. Keep the flap, lip and sides together and sew two straight lines. Easy peasy.
Pull the pillow inside out and put the pillow inside.
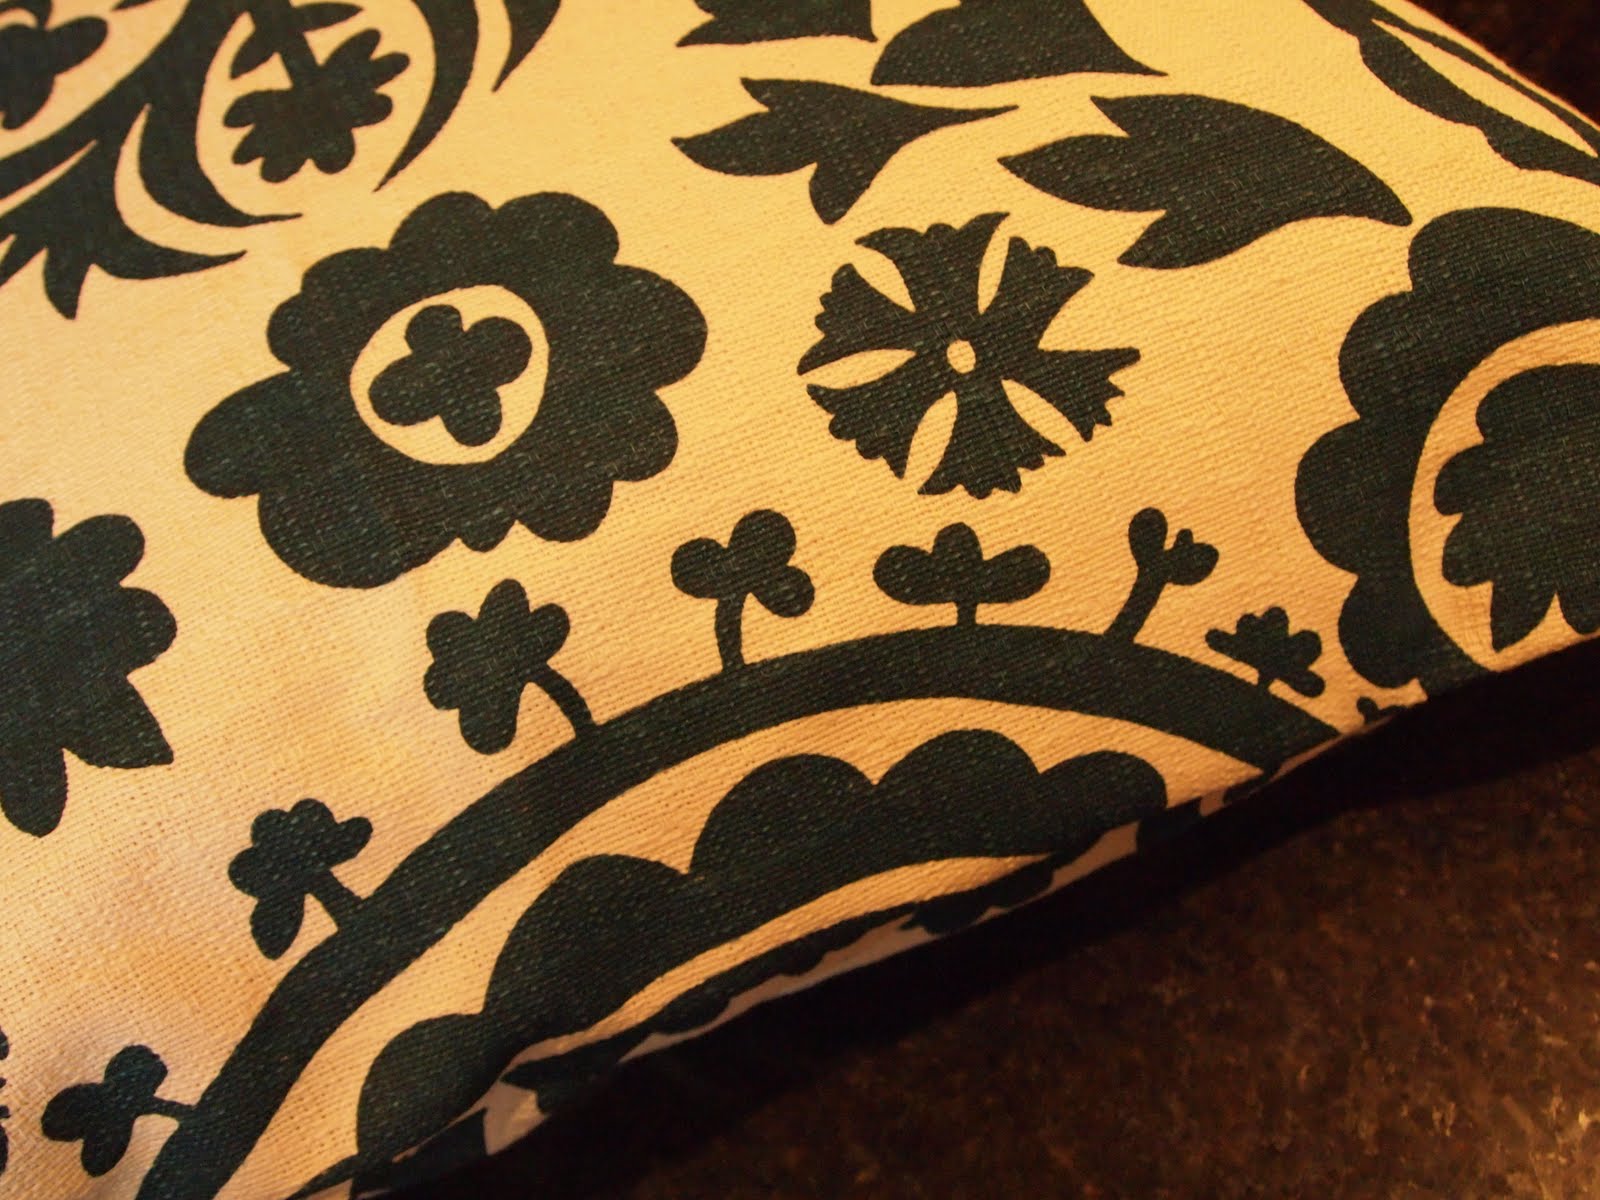

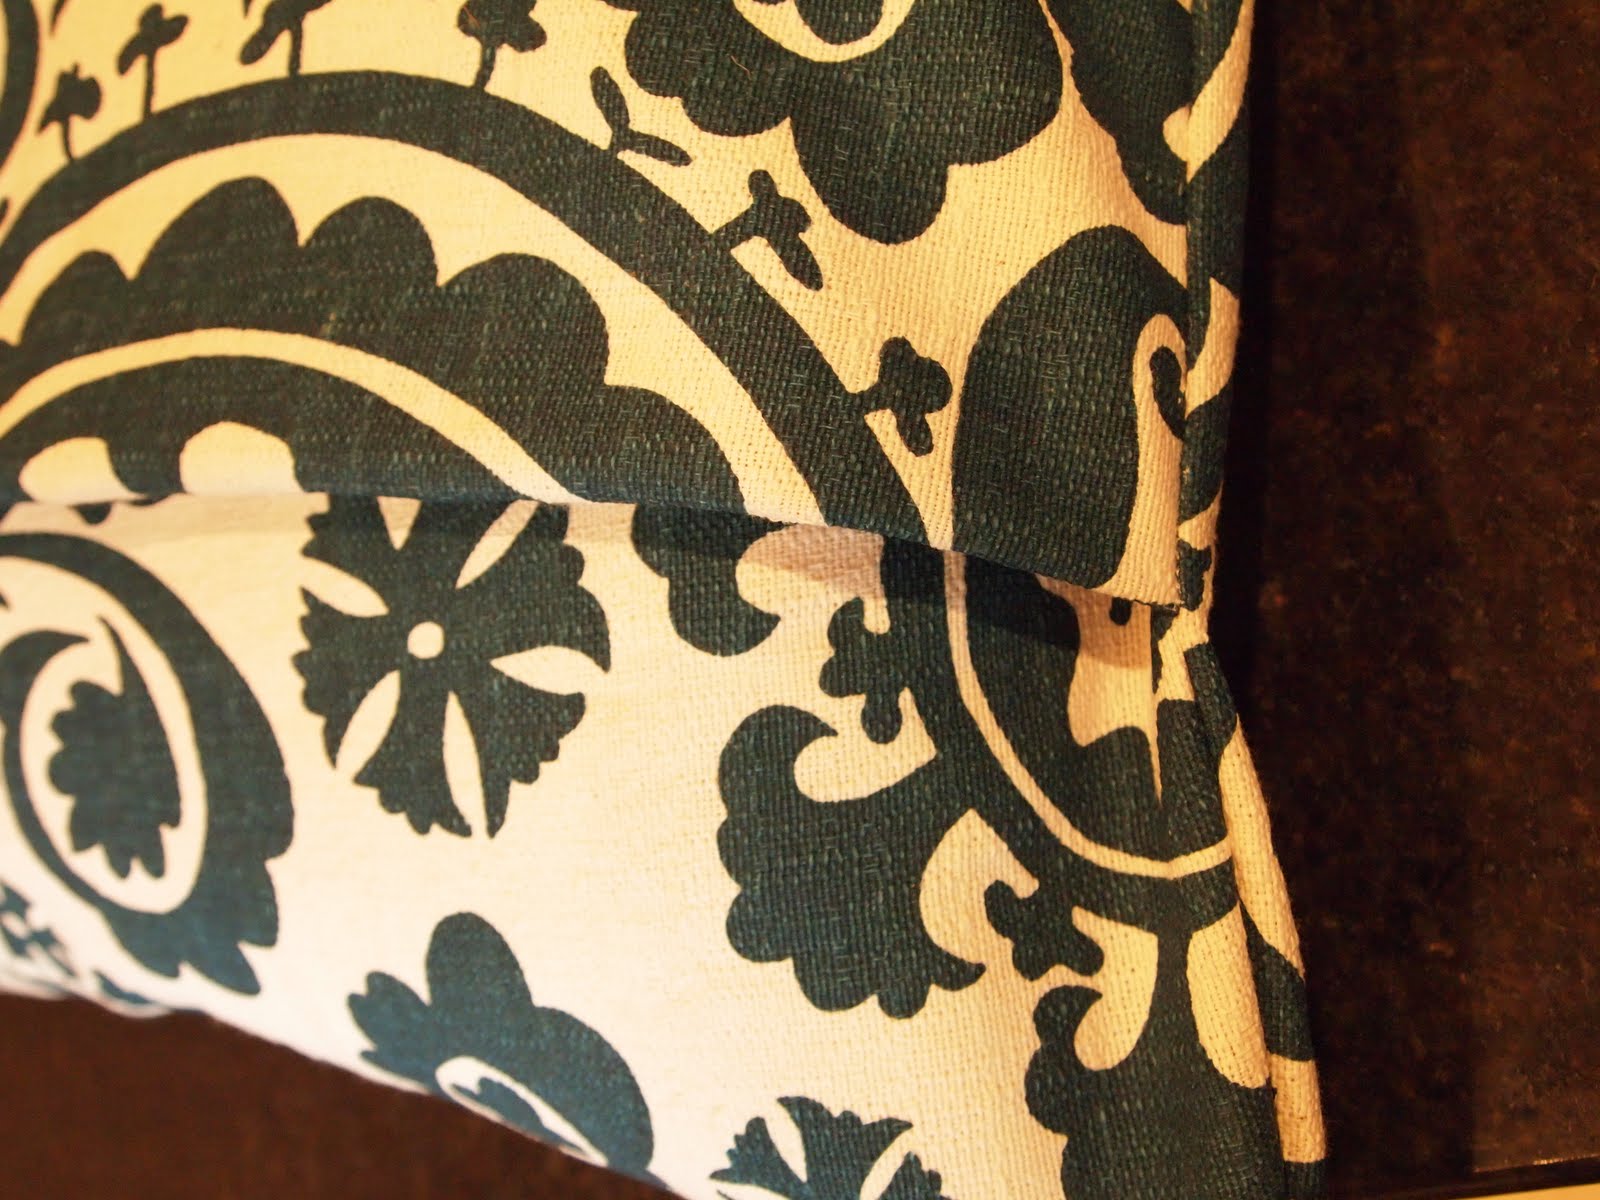
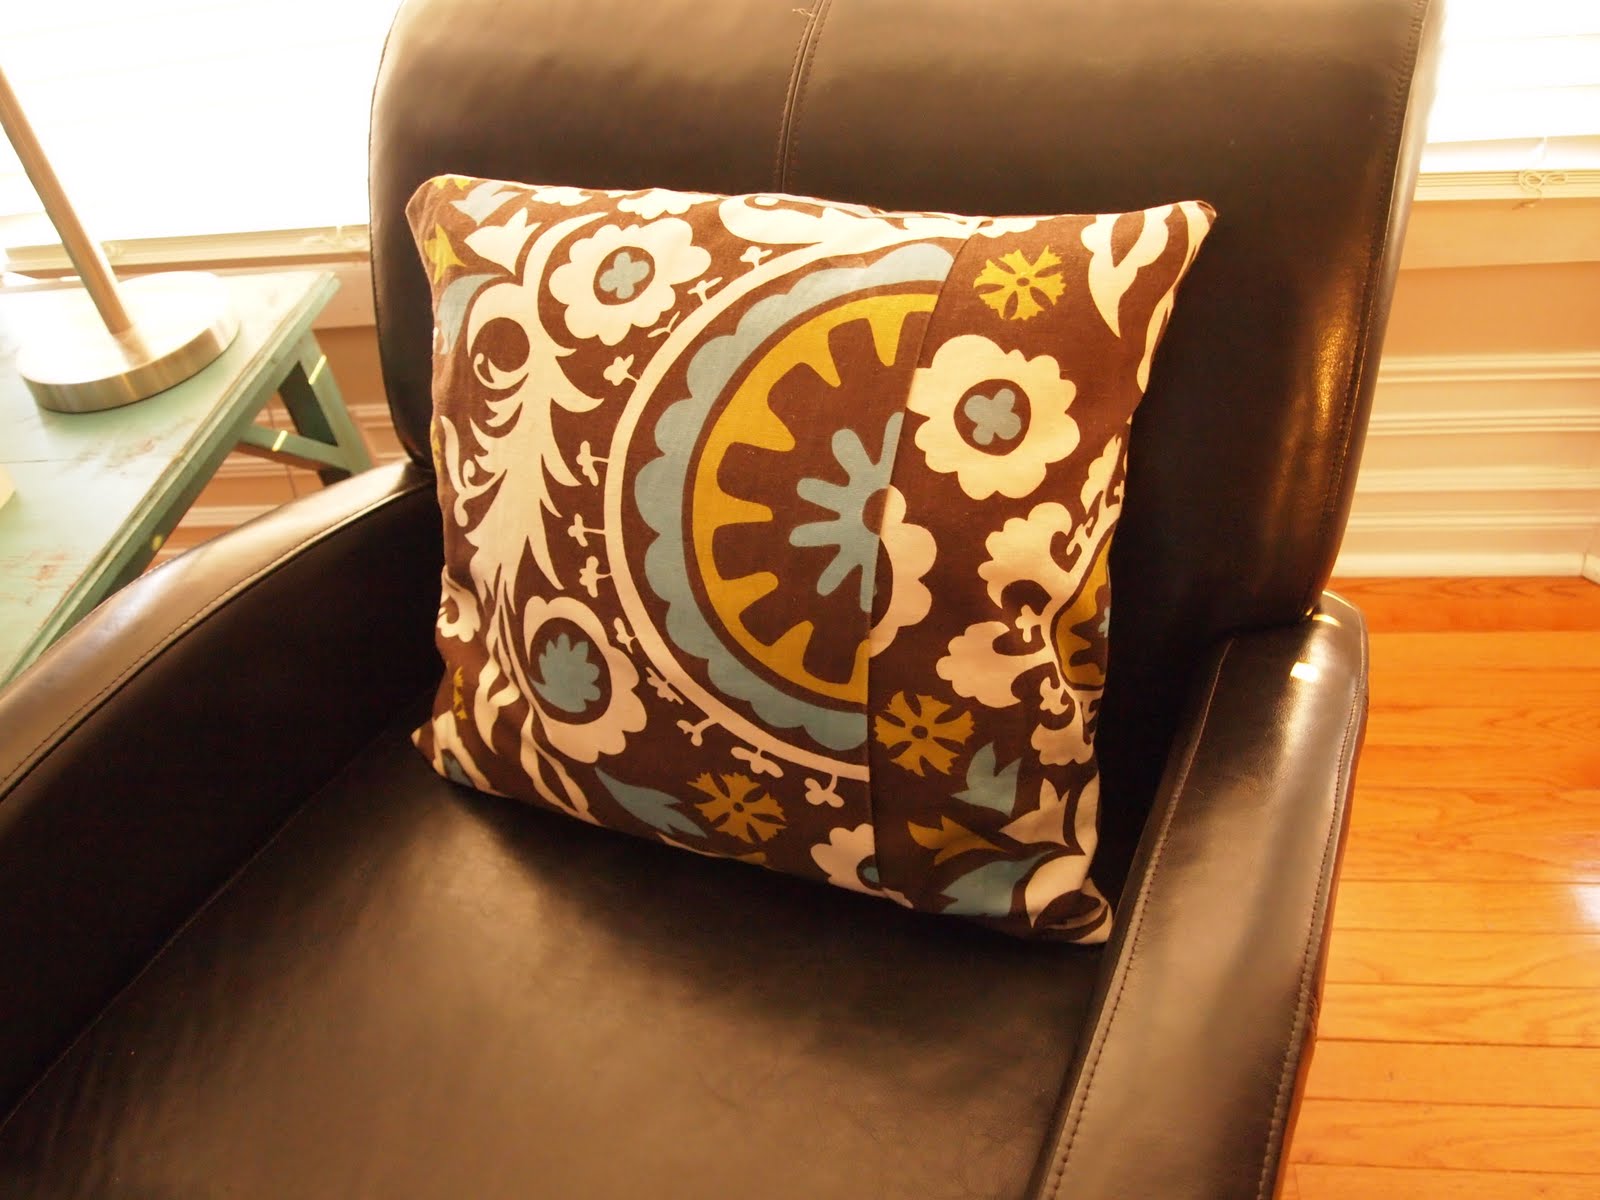
Here is a different pillow. See the envelope seam in the front? That is what the flap/lip become once you sew and turn it right side out. No zippers and only sewing on two sides. Yes, you use a bit more fabric, but you don't have to spend money on the zipper and the hair dye covering those grey hairs to sew in the zipper. :)

Thirty minutes to layout, cut fabric, respool bobbin (because that is usually how things happen for me), take pictures for you, sew the edges and slide in the pillow. Ta da! Easy, right?


Linking up with http://www.homestoriesatoz.com/ & http://www.tipjunkie.com/homemade-projects-726/ & http://www.houseofhepworths.com/


Good tutorial...looks great!
ReplyDeleteGreat tuturial. I have done a similar thing with some outside chair cushions. The only difference is you have to leave some holes on the outsides for the ties to poke through or make new matching ties and sew them on. Very easy
ReplyDeleteThank you!!!
ReplyDeleteThanks so much for sharing this! I was just at goodwill today admiring the shape of a few pillows thinking I should recover them!...but I do not want a zipper, etc. So now I should go back and buy them and make covers like you!! :-)
ReplyDeleteYou are very welcome. Happy sewing! :)
ReplyDeleteGreat tutorial! Thanks for sharing at Beach Cottage Good Life Wednesdays.
ReplyDeleteYou've been featured!
ReplyDeleteCheck out your feature at my weekly Hookin Up with HoH Link Party!
Feel free to stop by and grab a button if you'd like.
xoxo
Allison @ House of Hepworths
This is my kind of pillow case. The simple solutions ..always the best! Thanks. Lynda
ReplyDeleteVery simple! Thanks for stopping by Lynda.
ReplyDelete