
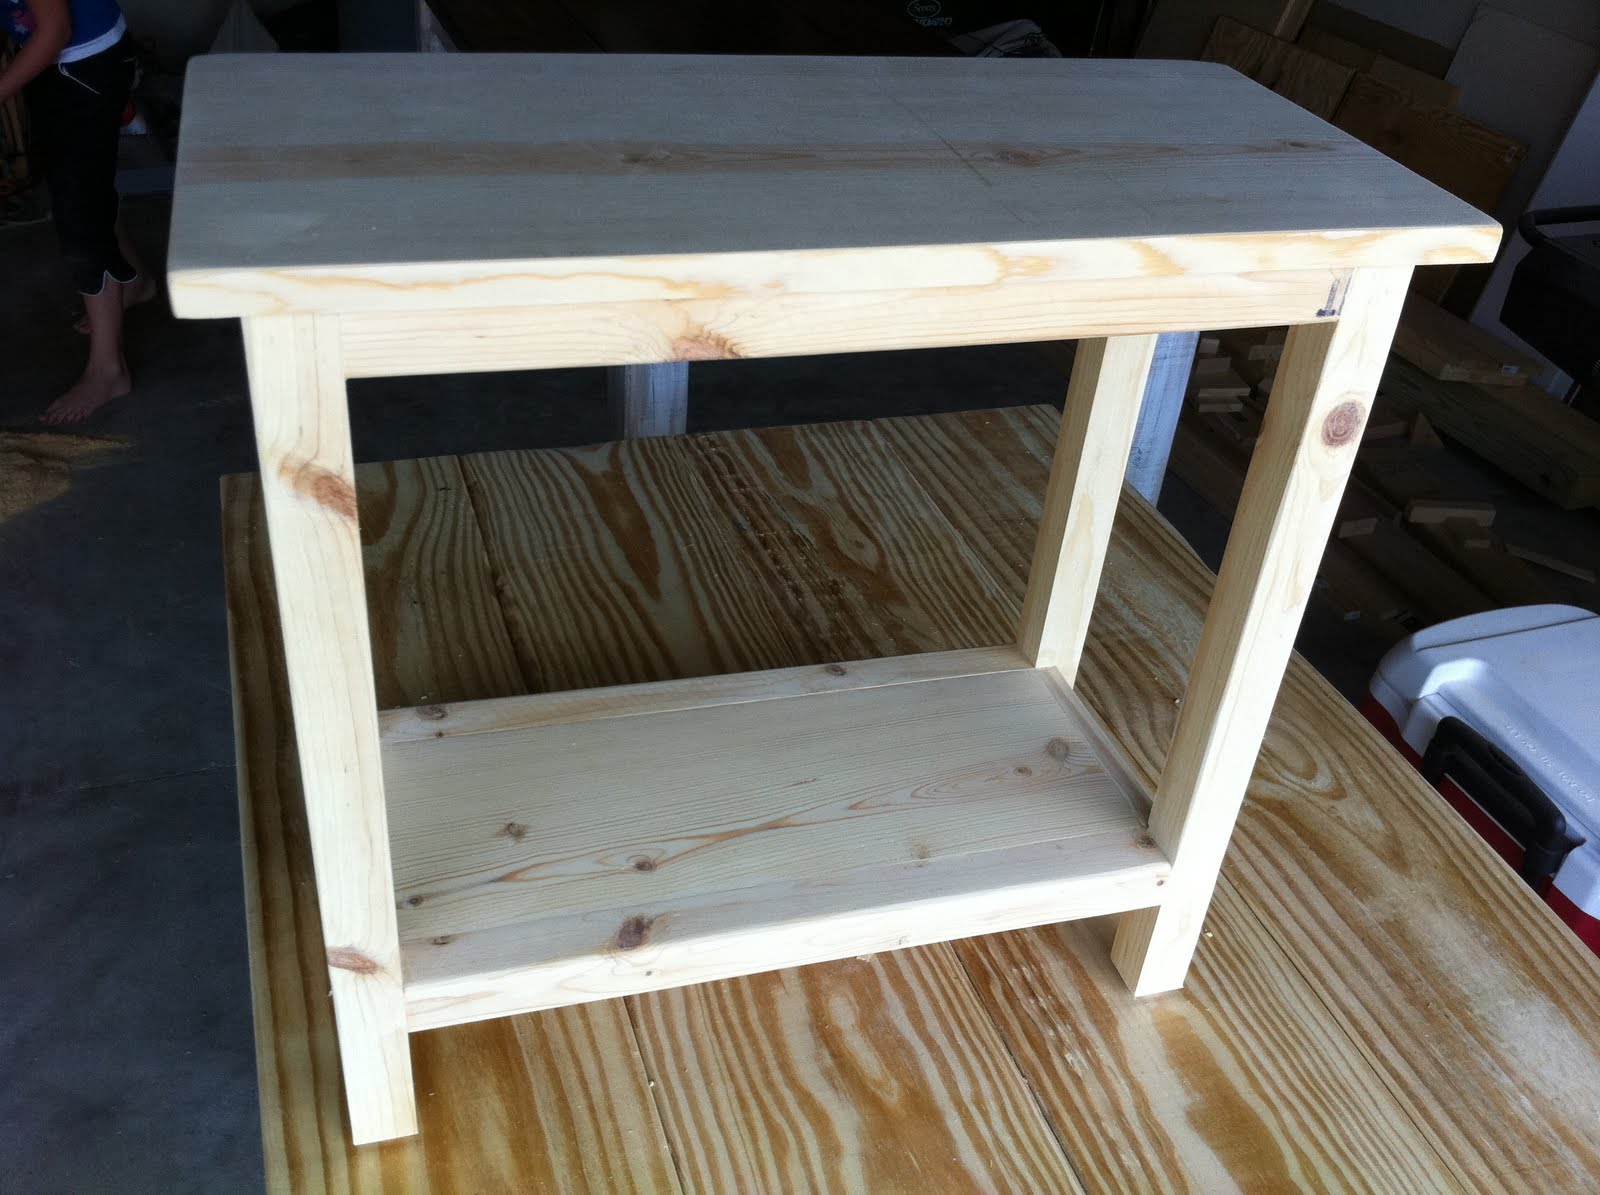
I measured the arm of the couch and it was only 22" tall. I think most end tables are 24" tall or taller.
So, I made a little (and narrow) table to fit the needs of my small room.
Here it is without the finish. Small, narrow and just the right height for my short arm couches.

4 - 21 1/4" (2"x2") legs
4 - 19" (2"x2") long cross boards - top and bottom
2 - 7" (2"x2") short top cross board
2 - 7" (1"x2") short bottom cross board (you can use a 2"x2" if you prefer for a different look)
1 - 19"x7" (1" board) this one is the bottom shelf
1 - 11.5" x 24" (1" board) this one is the table top
I didn't use screws this time, I nailed everything together with a power nailer with 2" nails.

Layout two legs with two 19" cross boards and attach together.
Then do the second side.
At this stage, you could instead just attach the top cross support boards with the legs. Then you could clamp the entire bottom shelf section together so it all fits together snug, without gaps.
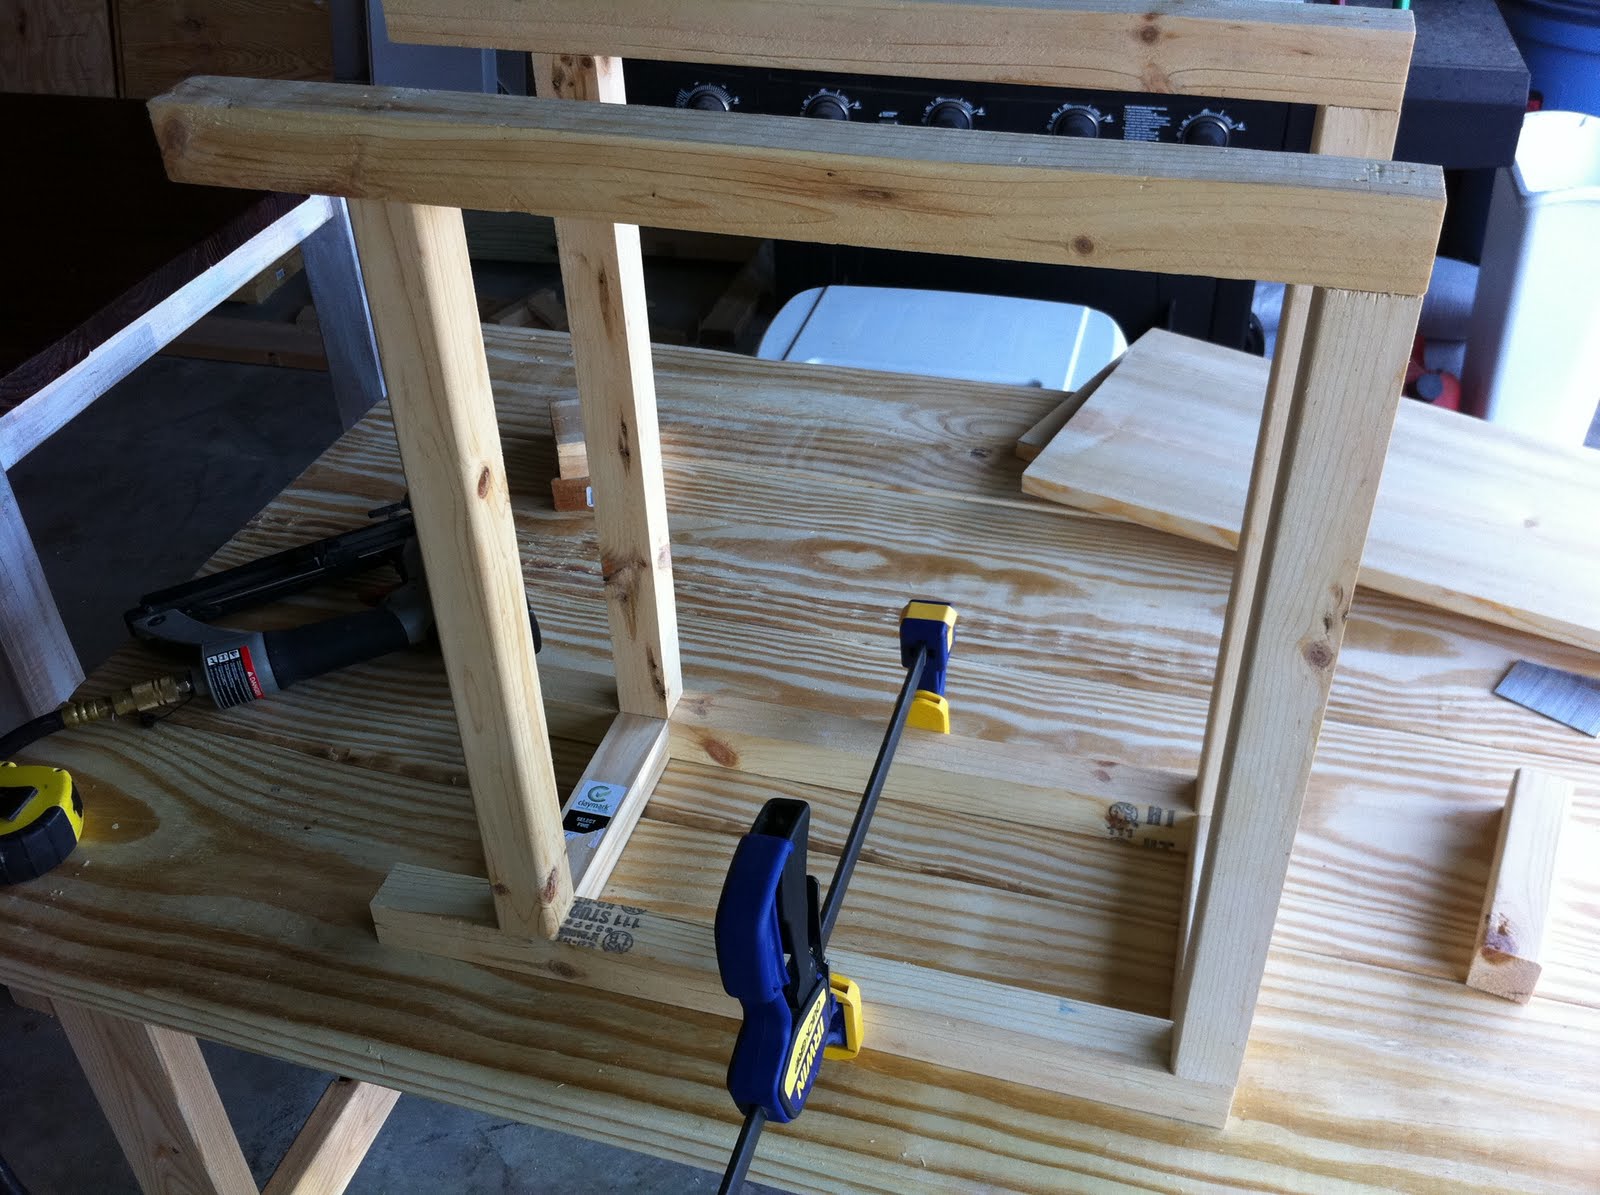
Then I attached the 7" cross boards to join the two sides together. The 1X2 were on the bottom shelf.


Then I slid in the bottom shelf into the opening and nailed from the sides.
You could always create an "L" shaped ledge with additional 1x2s nailed inside the 2x2s and 1x2s on the bottom if you need additional strength to the bottom shelf other than just the nails.
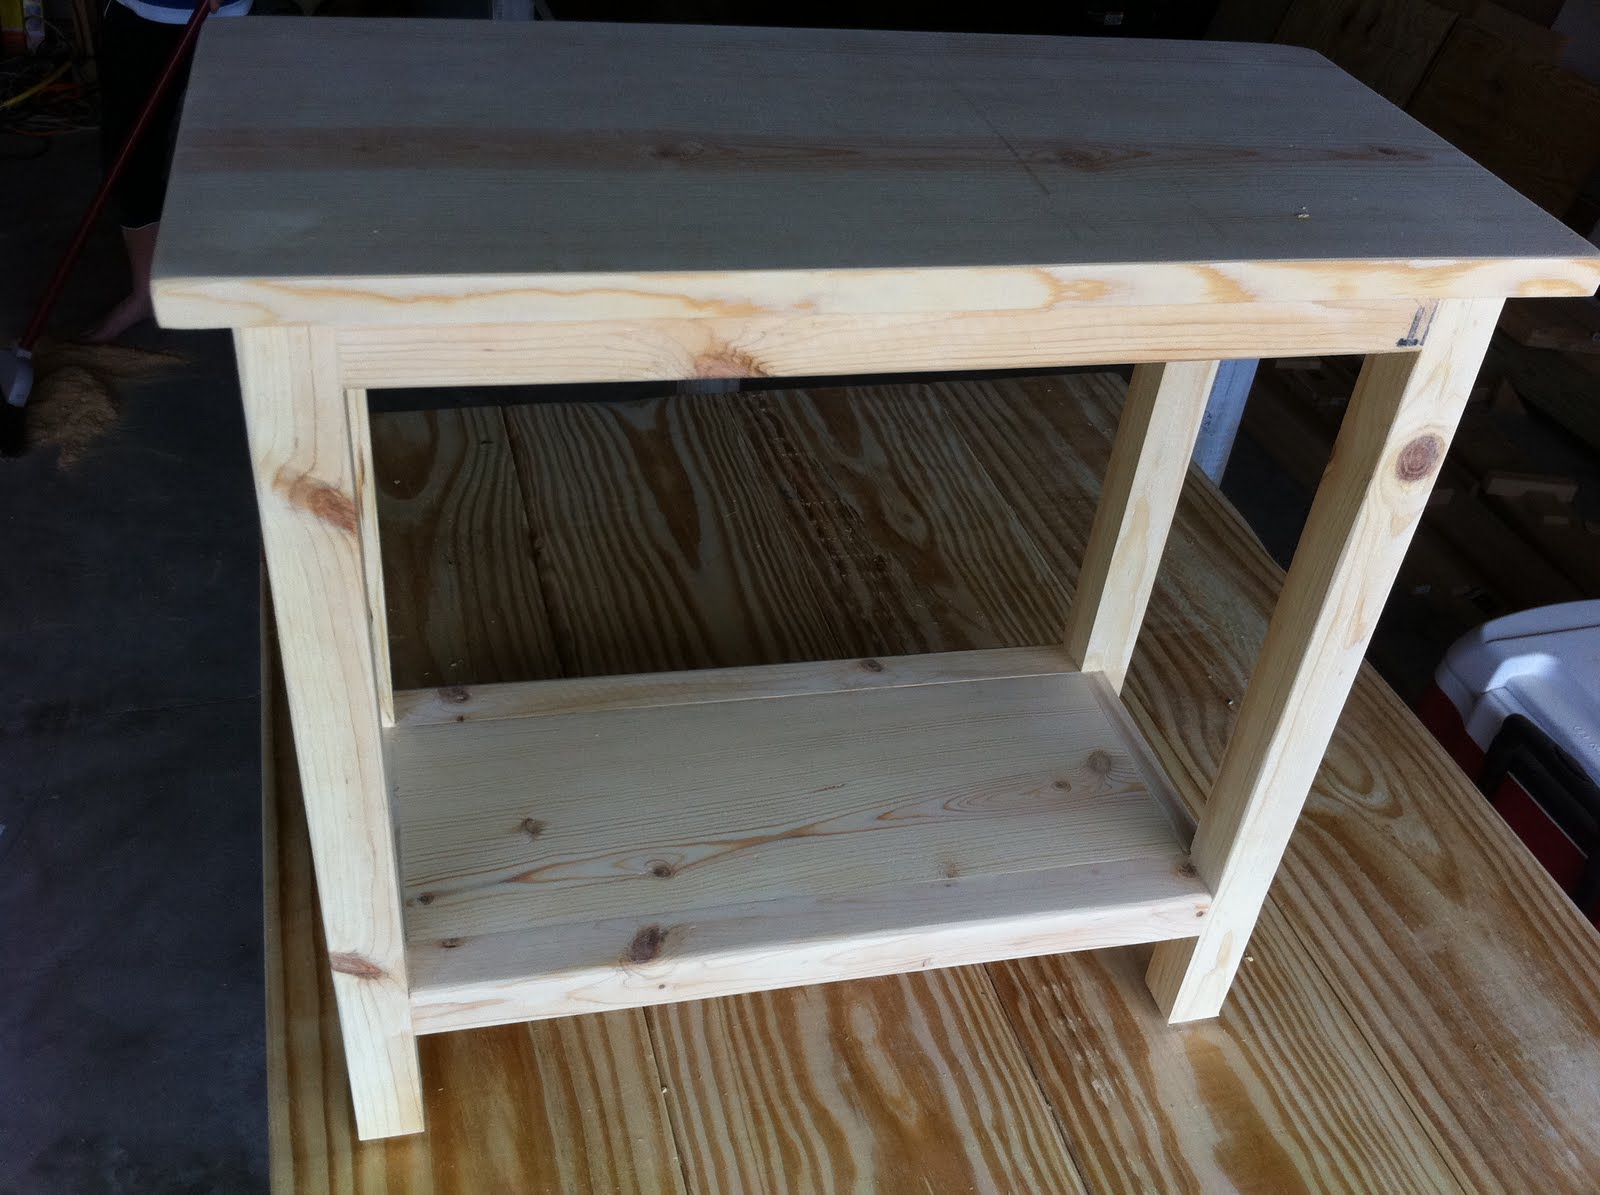
Then I nailed the top into the four corners, used wood filler and sanded. Now I just need to pick a paint and/or stain color.


Thank you for visiting. If you have any plans you share, please send me a link. I would love to see them.
Karen
UPDATE: I just saw this photo and became inspired on the finish for my little table.
 |
| Pottery Barn |
Good job! We are kindred spirits, I'm putting your blog on my regular reading list :)
ReplyDeleteThanks! I will do the same. I can't wait to see your work.
ReplyDeleteGood night you've got skills! I'm loving going through your blog and am now your newest follower :D
ReplyDeleteShelley
www.westermanfam.blogspot.com
Thanks Shelley! You are so sweet to say that. And thanks for following. I have some more builds coming up this week. I hope you like them.
ReplyDeleteYay, I just finished mine. I wish I could upload a picture. I put put a 1by 2 around the edge and used a router to give it a little detail so it looks a bit more like the other table I have. Thanks again!!!
ReplyDelete@Claudia Yay! Nothing feels better than doing it yourself. I'm so happy for you. Way to go!!!
ReplyDeleteglad i found this! started my table based off this design but using 2x2s for the frame and at a larger scale. just finished it this weekend =)
ReplyDeleteGreat job! I'm your newest follower!
ReplyDelete@MONICA LIVAS Welcome Monica! Thank you so much.
ReplyDeleteI am new to wood working. What type of wood did you use?
ReplyDelete