Pin It
Here is a little sneak peek into the laundry room.
Today I spent an entire day working to complete most of the tasks so I could spend tomorrow prepping and painting all the walls, ceiling and trim.
The metal backsplash is complete, the base cabinets are installed, the cabinet hardware is installed, the trim and batten board is complete.
I only got about halfway finished with the ceiling and that trim...but I'm too tired to finish tonight. Working over your head is exhausting, but I love the plank look on the ceiling.
I'll be posting more details for each project in case you have questions.
Stay tuned over the next few days as I finish up and show everything.
Thanks for stopping by The Quaint Cottage.
Simple Fix for Furniture Backing
Pin It
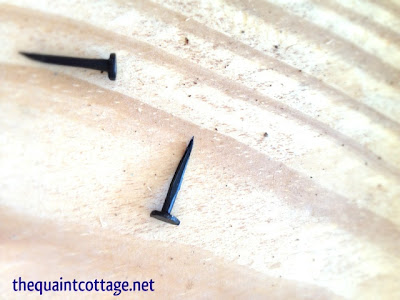
These little guys can help your furniture.
Yeah, yeah. I know they say right there on the box they are for carpet. But, wait! Check out how to do a quick fix on your furniture.
Have you ever moved a heavy piece of furniture (especially across a carpeted room) and the backing comes loose? If you are like me, your first thought is - "Who Cares?", it will just be smushed up against the wall.
As crazy as it sounds, that cheap, thin backing does more than just cover the back. In most cases, it does help keep your furniture in one piece and square.
While I was moving those tall pantry cabinets to my garage yesterday by myself and I noticed one of the backings was coming off. Since I used these on several projects to attach thin lauan to furniture, I grabbed the pack and fixed the cabinet in just about thirty seconds.
Next time you are rearranging your furniture, be sure to keep a small packet of these carpet tacks in your junk drawer, right next to the small nails you use to hang pictures.
Go from this....
To this...
How crazy does it sound to feel like you accomplished something just by tapping a few tacks on the back of furniture?
Have a great week!
Karen :)
DIY Can Good Storage
Pin It
As I posted on facebook yesterday, I built these super easy and super affordable can good holders for my new pantry shelves I just installed in the laundry room (which serves double duty as the pantry).
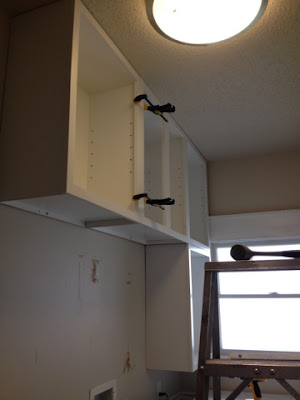
Here are the eight new basic stock cabinets from Lowe's I just added to the wall of the laundry room to make use of the space of the wall (9' high ceilings). I'm loving not having the doors on the fronts so we can "shop" for what we need by just walking in the room. I'm still in the whole "styling" and organizing stage of the shelves, so don't roll your eyes too much at the incomplete look. Pretty please?
Here is the view from the window wall. If you look at the bottom of the picture, you can see the installed can good organizers. I chose to use the same white melamine shelving as what is used on the cabinets to make it blend into the inside of the cabinet. PLUS, I didn't have to paint it! Score one for Karen :)
The can good organizers I found on line were metal and didn't fit the exact opening I needed. I built my own for much less than the metal ones (which were $36 each!). With this plan, you can build up to four of the size I made for under $36.
See how they just blend into the cabinet and look like they are built in it?
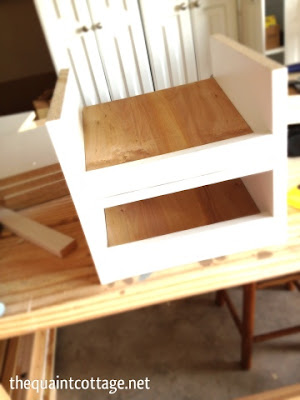
Here is the process.
Step one: Cut the sides and the ledges.
Step two: Attach pieces to the walls of the unit.
Step three: Set the lauan onto the ledgers.
See? I told you it was easy! Below I drew up a sketch of the size I used for my 12" opening with a cabinet depth of 11.5" (if you have doors, it will be a depth of 10.5-10.75"). The height of my can good holders are 11". Again, the plan can be adjusted to any size space, but I think if you go past three cans wide, you may want to use something more sturdy than the lauan. Additionally, if you make the unit taller and add shelves, make certain the cans will fit thru the opening, don't just measure with the can in place on the shelf.
Cut list for 1 can good holder:
2 - 11"tall x 11.5"deep walls
(the melamine is 11.75" deep, I had to trim mine down) If your doors are on your cabinets, your cuts will probably be between 10.5" and 10.75"
6 - 1x2" 10.5" strips
2 - 10.5x10.75" lauan cut for the shelf
If your doors are on your cabinets, your cuts will probably by between 9.75" and 10"
I used 1.25" finish nails, but you can use screws if you prefer.
Wood glue, wood filler, etc.
 |
| Flip the ledge over and attach the ledge to the front (finished) edge of the melamine. Make sure the bottom ledge is flush with the front and the bottom of the wall. |
 |
| Measure down 5.5" (halfway point) from the top and mark the edge of the wall. Attach the top ledge to the wall keeping the front of the ledge flush with the side wall front edge. |
 |
| Attach the back supports at the marks you made in the last step. |
I hope this gave you a helpful way to store your can goods.
Let me know if you have any questions.
Happy building!
Karen :)
Linked to:
Pantry and Laundry Room Make Over
Pin It
Ever since we ripped out our pantry in our kitchen during the renovation in order to add more cabinet and counter space, we have used tall cabinets in the laundry room to store our snacks and dry goods.
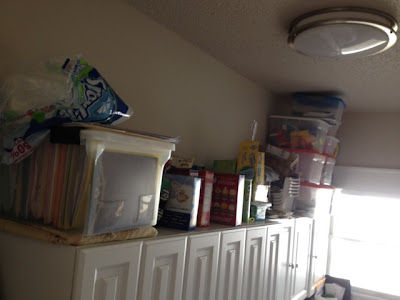
However, the cabinets were only about six feet tall and the ceilings were nine feet tall. It left a large spot to pile containers to the ceiling (where you can never get to anything without learning how to juggle first).
I was going to build my own cabinets to make sure I had exactly what I wanted, but I changed my mind at the last minute and bought the stock white cabinets at the hardware store instead. Not the best choice for customizing, but it was instant install. The stock cabinets were about three times more expensive than building my own, but I figure I saved about a month of my weekends. Bonus for me!
Here is the beginning of the renovation:
Here was the starting point (see all the wasted space?):
Now I just need to figure out if I'm going to leave off the doors and buy baskets and trays to store the pantry items or put the doors back on to hide everything. I'm kind of liking the idea of having the doors off so I know where everything is located.
Thanks for stopping by to check out the latest project.
Karen :)
Subscribe to:
Comments (Atom)


