Back Home from Vacation

Pin It
As I mentioned in a few previous posts, my family and I spent some time at the beach this month.  The weather was perfect the entire trip - we were very lucky.  I constantly had my Kindle in my hand and read over ten books when I wasn't swimming and hiding from the sunball in the sky.  We used three or four bottles of SPF 50 & 80 and happy to report no major sunburns.  I can't say I'm happy it's over, but I was glad I missed TS Debby by a good 12 hours. 

Side note tip for taking your iphone or kindle to the pool or beach - use the snack size ziploc bags for your phone and a larger size bag for your kindle.  You won't have to worry about dripping water onto the screens or the sea spray/sand from the ocean.  It worked perfectly for me.

Now that I'm back and trying to get back in the swing of things with the blog, I thought I'd share some of my vacation pics.

Instead of just posting about it, I'd thought I'd add a feature on the blog to highlight anytime I have a fun picture to share with you. <insert drum roll here>

I added Instagram picture feeds!

In the picture below, you will notice I added the "Quaint Cottage" instagram feed on the top right of the blog page.  The Quaint Cottage instagram usually just focuses on all things to do with projects or adventures at the hardware store.  So, if it wasn't worthy of an entire blog post (because I don't normally just post things just for a single picture), you can find it here.


I also added my personal Instagram feed for anyone who wants to take a peek into my NON-blog world.  Again, I usually don't post things on the blog in reference to my own life or family just for the fact I started this blog as one to catalog my DIY projects. 
Although my life is one major DIY project all by itself if you ask me. 


Now that I've officially announced my return from vacation, I guess I need to get hopping on finishing some of my projects in the half bath and start a new mess in a new room.

I missed y'all!

Is anyone heading out on their vacation soon or just return? 
Did you chose to go to the beach or pick something else?

More to come soon.  Stay tuned.

Karen 


Half bath Bookshelf - Installed

Pin It
Last week I posted on facebook and twitter a picture of the bookshelf I was working on to install in the half bath.  Part of the post was just me whining about painint it because I do that.

Well, I broke down and bought a paint gun....and I didn't use it!!  What?!

I read the directions and it said to use when temperatures were between 45-90 degrees.  Working in the garage, the temps get much hotter than 90 degrees when the regular temperature is 90, so I didn't use it.


After I started priming this piece, I realized I didn't have enough anyway.  As you will see in the bottom photo, I made it about seven feet up and ran out.


So now in addition to finishing the priming and caulking, I need to paint it.  But, with the help of the hubby I was able to squeeze this huge thing into the small half bath and install it.  Then I added a little cubbie up top to give it more of a built in look.

I just threw some goodies on the shelf for now to see how it would work.


Almost finished with the room.

Have a great week!

Karen

Stacked Baseboards

Pin It
As I try to waste time this morning to avoid going in the garage to build the bookcase for the half bath, I'd thought I'd answer one of the emails I received from a reader.

I've lived in this house for over ten years.  According to my master plan when I moved in, I should have completely been finished with all my remodel projects by now....finished the basement and possibly have an in-ground pool.  However, when I tend to remodel over and over until I think I've got it right things take a bit longer than I plan.  The only thing I have going for me is my overwhelming need to keep the structure as classic as I can.

By classic, I'm referring to the oak wood floors, trims & molding, windows, doors, etc.  The "structure" things you shouldn't really need to change when you remodel a room around a new comforter you purchase.  Classic white trim and oak wood floors (in my eyes and heart) will always be in style.

A reader spotted these baseboards in a photo of an end table I did last year.

Hallway to family room from front door

When I started installing the 2000+/- square feet of wood floors about three or four years into living here, I was sitting on the couch with a Pottery Barn catalog on my lap.  I don't have it anymore or I'd show you the picture of the inspiration.  While flipping through it I saw one of their beautiful pieces of furniture, but that isn't what caught my eye.  It was the stacked baseboard behind it.  I had to have sat there for an hour trying to figure out how to recreate those same baseboards.  But the thing that kept halting me was the fact their baseboards looked like a 1x12 board routed with beautiful grooves to create a piece of art.

Then, I set down the catalog and headed to my hardware store for therapy (Yes, I like to hang out in the lumber section to clear my head.  Some girls shoe shop, I buy lumber.  Don't judge).  I started picking up pieces of trim molding and inspecting them.  I brought home about five different pieces and began to create.


Hallway

But, when the dust settled, this is what I ended up doing.

1 - Top piece 1 1/4" Picture molding
2 - Middle piece 1" framed rope molding
3 - 5" baseboard (which I'm certain you could create with two separate pieces)

Unfortunately, it was BB (before blog) so I don't remember item numbers, prices, etc.  But, if you have read this blog before you know I'm all about creating something special on a very thrifty budget.  I wouldn't have bought the high end $5 a linear foot stuff.  When I win the lottery (because I will someday, I just know it) I will probably still have the same need to recreate things on a budget I will just have way more time to do it.

I measured 11.5" up from the floor (same as a 1x12" piece of lumber) marked around the room with my tape measure and level and installed the picture molding.  Then I marked 8" up and repeated the process with the framed rope pieces.  Then I installed the baseboards.  I don't think it matters if you start at the top or the bottom.

Then, caulk, prime and paint.  I do remember the day I painted mine I had the Cardinal v Brewer game on in the background.  It was hard to pay attention to cutting in with the distraction.

Front Living Room


I still have some requests to see the kitchen (which was also a total gut before the blog).  I haven't forgotten.

Have a great day!!!

Karen

Linked to:

I {heart} my new food dehydrator!

Pin It

Off the subject of the half bath for a moment....  Here is a random post.

I've recently discovered the art of dehydrating food.  Okay, it may not be an art, but it's pretty cool.  I've only made jerky, apple chips and banana chips, but I am going to test fruit roll ups this weekend.  I love this little machine!!!!

The fruit obviously takes much longer than the jerky because of the liquid content, but the jerky is ready to go in about 4 hours.  All you do is mix the seasoning with the meat and squeeze through the gun.  How easy is that?  I'm planning on making a large batch of goodies for our upcoming road trip to the beach.

My co-worker also decided to buy one and she has made her own spicy red pepper seasoning.

Why did it take me so long to test one of these wonderful machines?  My whole family loves eating jerky, but it is so expensive and packed full of preservatives.  Now we make our own with the jerky gun (yes, there is such a thing) and jerky seasoning (which I made have to make my own some day).

I've even found dog treat recipes for the dehydrator!  Actually, I may need to make Max some of those because right now when he smells the jerky he barks at me to give him some. 

Do you have a dehydrator?  What type of stuff do you make with yours?

I'm adding the links to the items I purchased if you are curious.  This isn't a sponsored ad post, just sharing what I found.  :)

Karen

Amazon

Amazon

Amazon


I Can See the Finish Line

Pin It
Does anyone else get so involved with a project in your house you ignore the laundry and start naming your dust bunnies and passing them off as pets?  Well, I do!

My house is in complete chaos right now because the kids brought home all their school projects, papers, supplies and just threw them where they found room.

Instead of doing something about the mess, I decided to work in the half bath tonight after work.

Now, all of the painting is complete!!!!  Yippeeeee!!!!


This weekend I painted the white paneling (which I had primed last weekend).

And tonight I painted the walls.  As much as I truly loathe painting, I do love the finished product.  Plus, my arms and legs get a bit of a workout so I can't complain.

Also, over the weekend I started the vanity project.  Here is a sneak peek at what I'm making. 

I stained it, but I'm thinking it is a bit darker than I wanted.  I'll see what it looks like in the room before I decide if I need to make any changes.

If anyone will be interested, I'll post some plans of the vanity.


Lucky for me, I had plenty of paint left over from the laundry room remodel to use in the half bath.


I need to finish the sink this week since I'm having guests for a BBQ this weekend. 

Wish me luck.

Karen :)

Half Bath Update

Pin It

Well, two weeks of life getting in the way of the home improvement projects really sets me back.

First, the Saint Louis area was hit with a couple of rounds of hail storms.  We were very lucky and didn't get the golf ball + sized hail, but we still had some damage to our roof.  We will be getting a new roof next week courtesy of our insurance company.  Yay! 

Then, our condensing unit and a-coil died just when the temperatures were a steady 90 degrees.  It doesn't bother me too much, but my children claimed they could possibly die from the heat.  Poor babies!  Needless to say, they spent a lot of time in the sprinkler and stationed in front of the fans in the house.  The day we had the new one installed the temperatures returned to a more seasonable 72 degrees.

Last weekend, we were able to witness a gorgeous Super Moon.  Sadly, I only had my iphone handy to snap a photo, but hopefully you were able to witness it in person.


Since the house was a sauna for about a week, I couldn't work on the half bath.  1)  Couldn't install the rest of the paneling when the wood is swollen from the humidty.  2)  Couldn't paint the already installed paneling because it never would have dried.

Finally, this weekend I jumped back into the project.

Here is the little room with the completed primed paneling.


Before:

Progress:

Primed:


Now you see the popcorn, now you don't :)
I promised the hubs I would build the vanity and install the sink next weekend.  Stay tuned to see what I make.  Have a great week! 

Karen

Half Bath Inspiration Board

Pin It

This is a quick post to show the direction I'm heading with my current project. 

Presenting.....my inspiration for the little half bath remodel. 

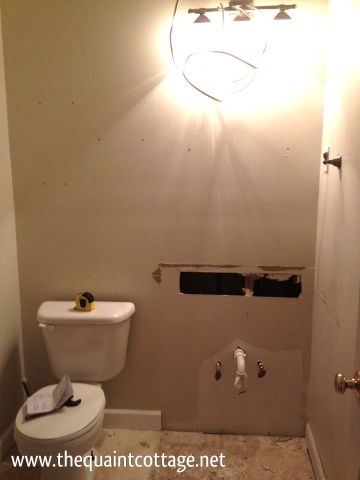
Currently, the room is a party of blah beiges - beige floor and beige walls & ceiling...Do you hear the big YAWN?! 

I'm hoping by adding the overhead light, along with the crisp white bookshelf and white plank wall & ceiling it will brighten the room a bit.

I'll be building the small bookcase and the rustic vanity to save money and get the exact size I need, but I'm still on the lookout for a vintage door.  I'll head to the Habitat Restore next weekend if I can't find one on Craiglist before then.

For now, I'm waiting for the planks adjust to the house temps/humidity and for the sink to arrive from Overstock.  While I wait, I'll draw up the plans for the two items I need to build and create a frame to reuse the current oval shaped mirror.

Stay with me.  Tons of good stuff to come.

Link to Pinterest Board

Karen