
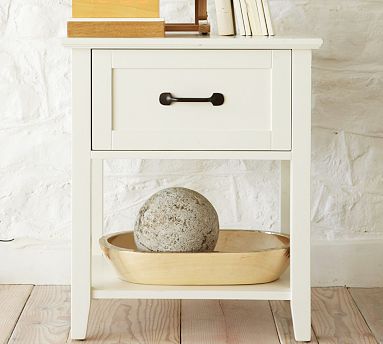
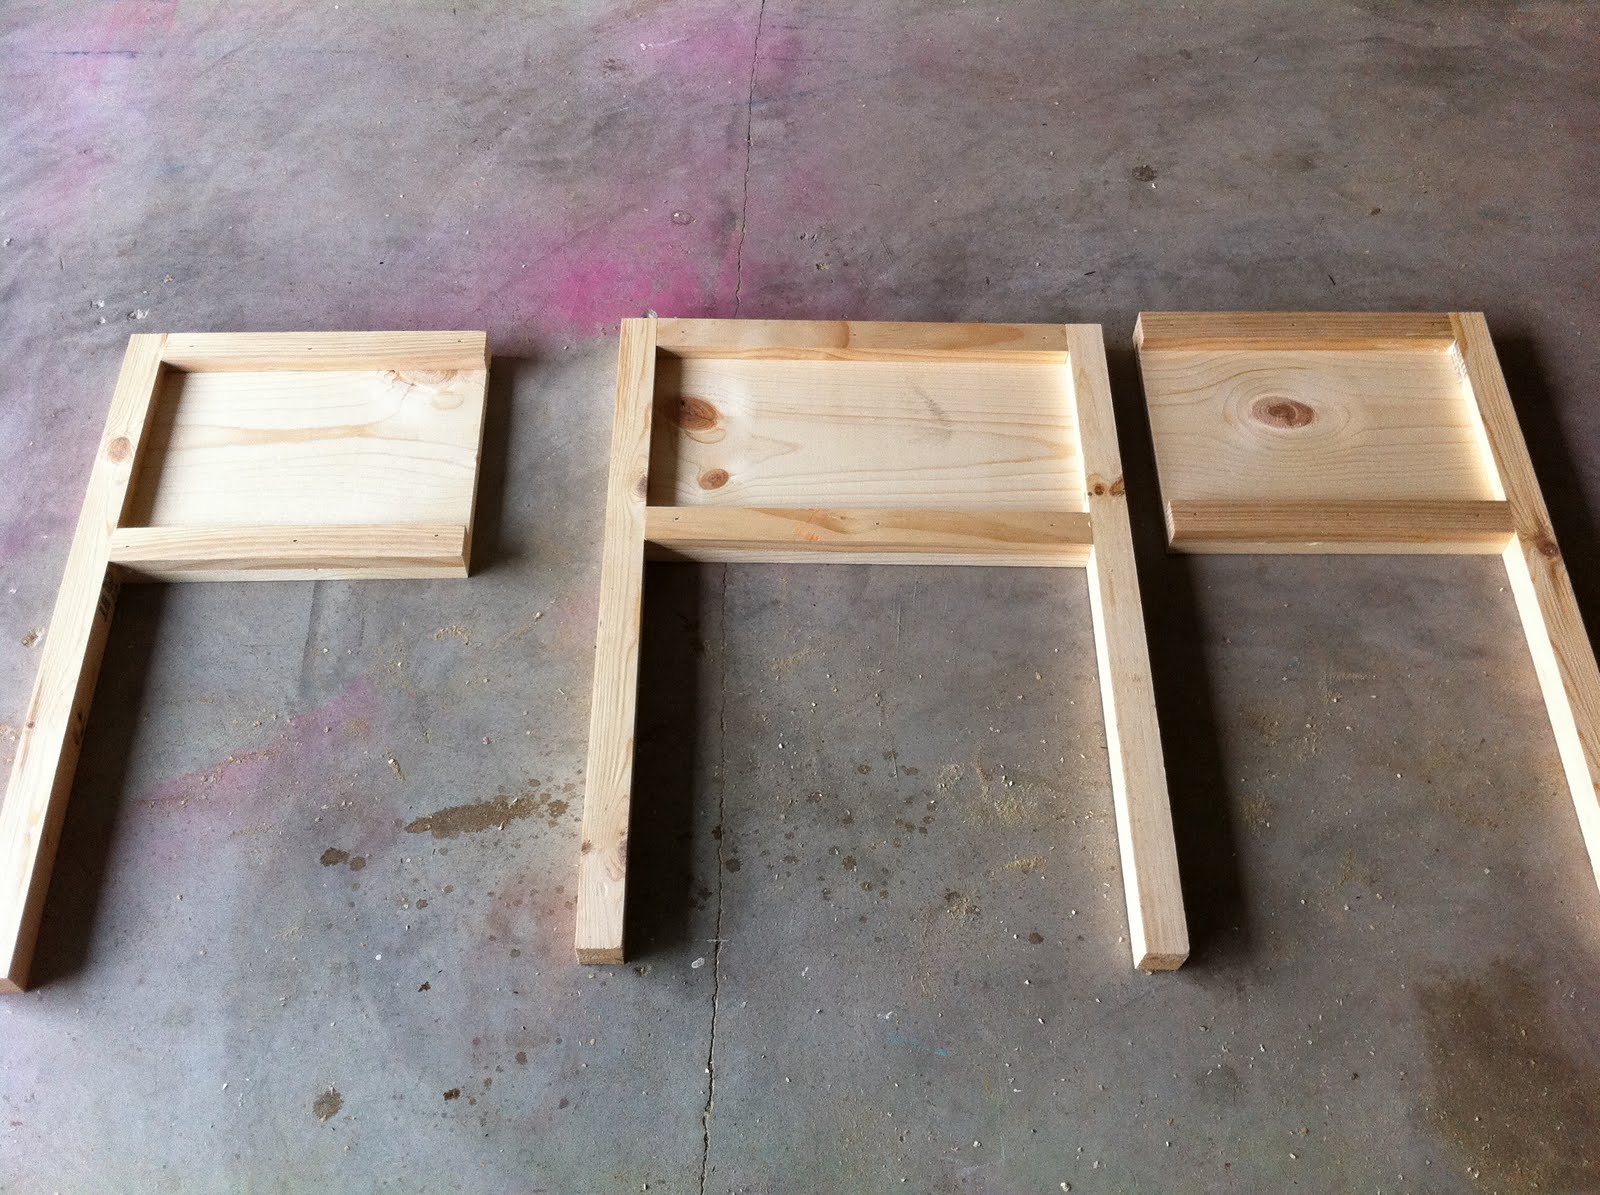
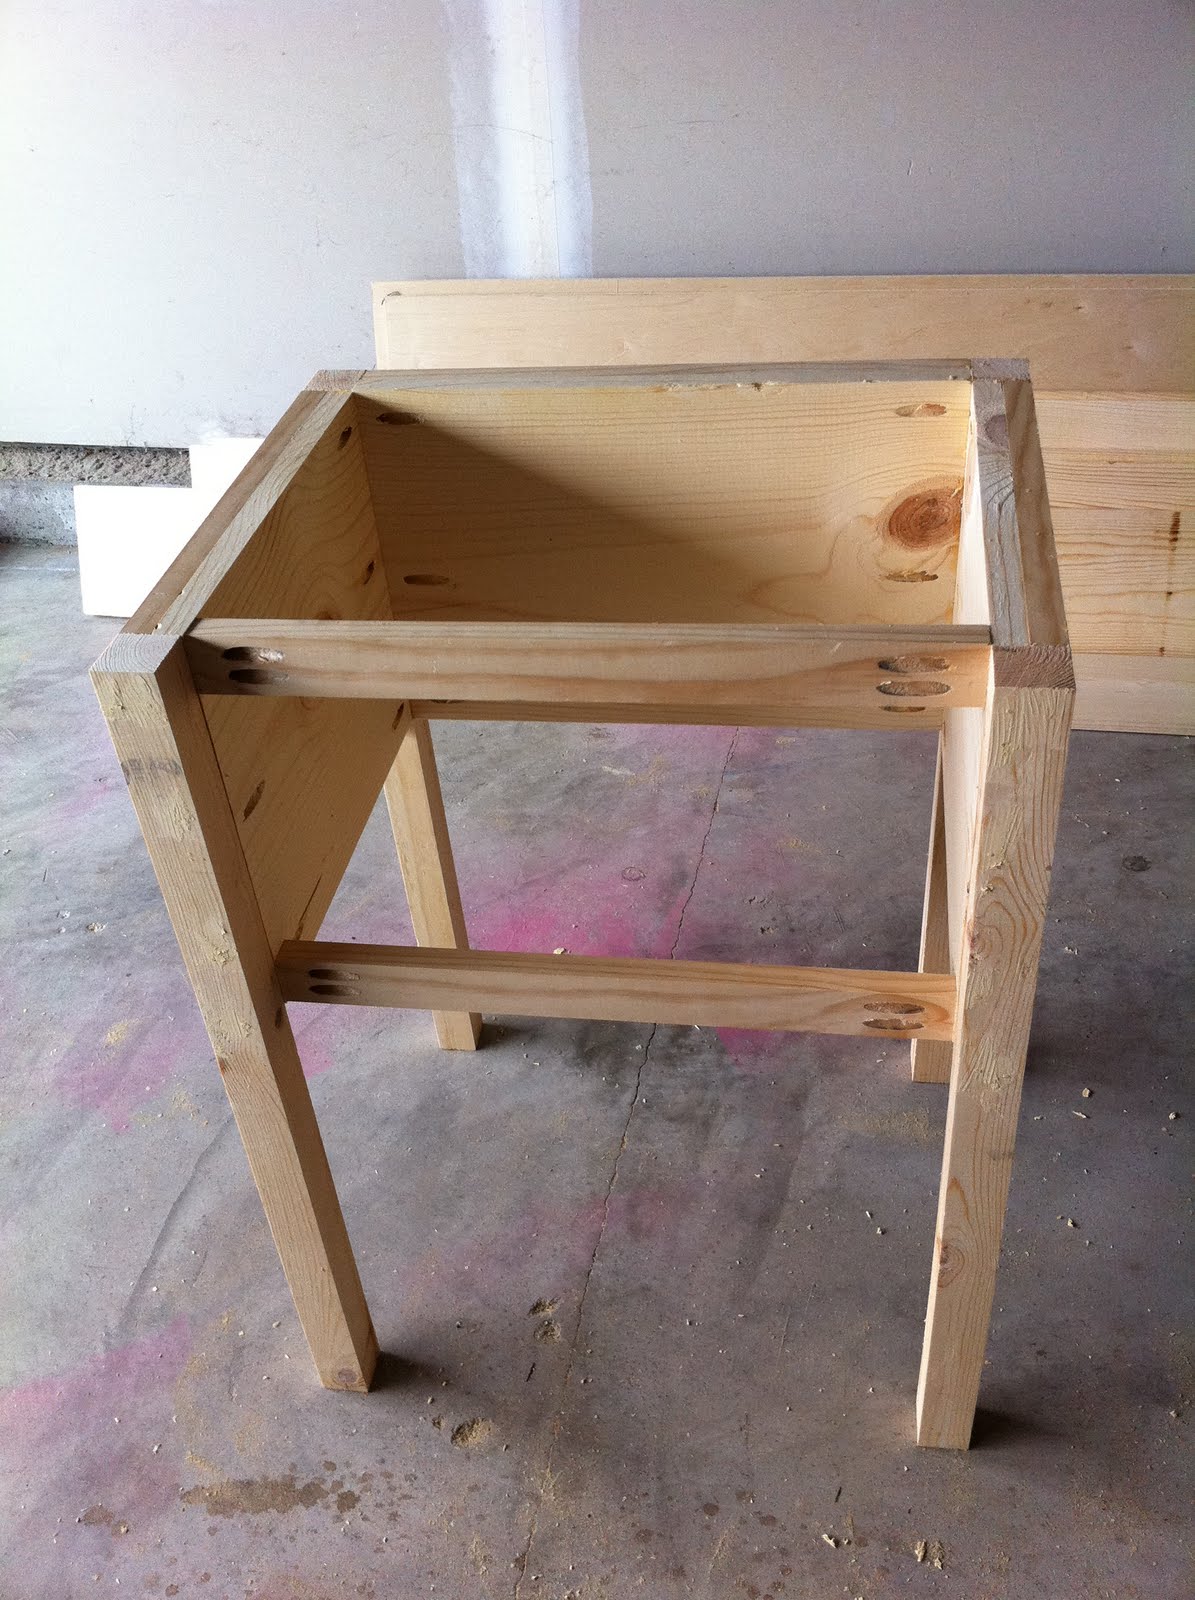
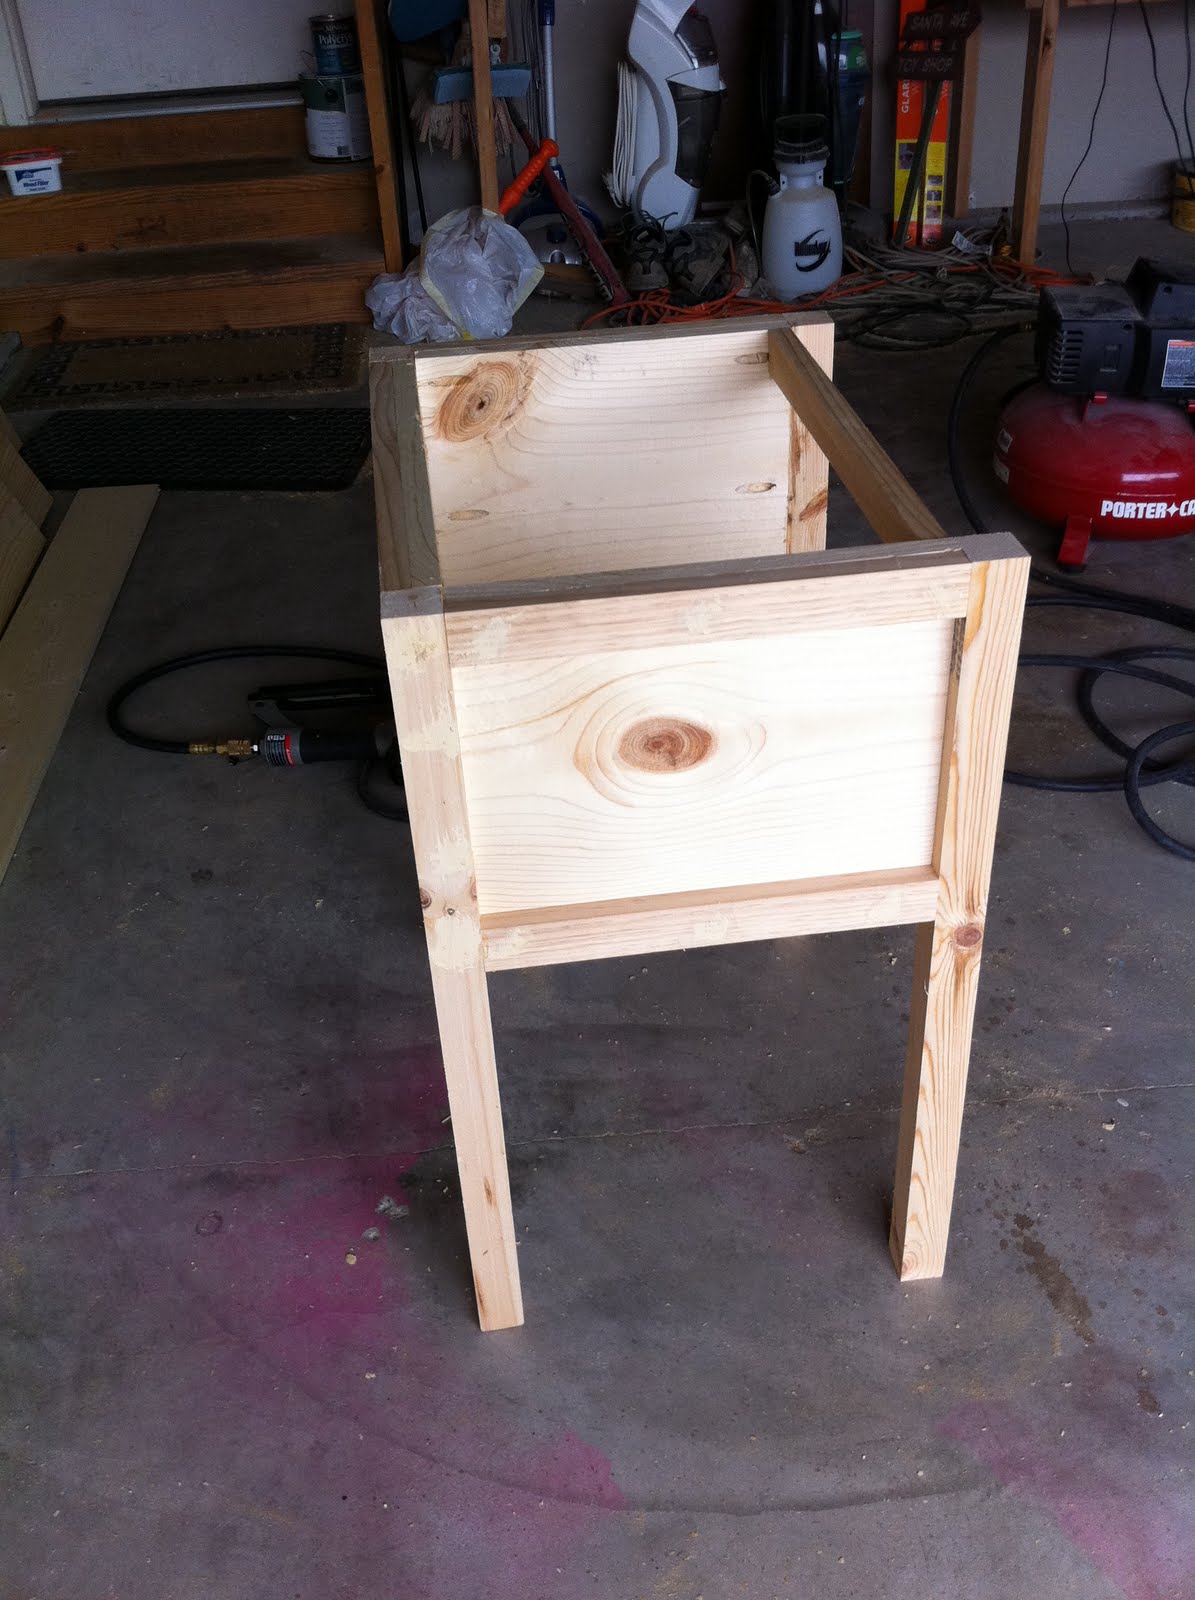
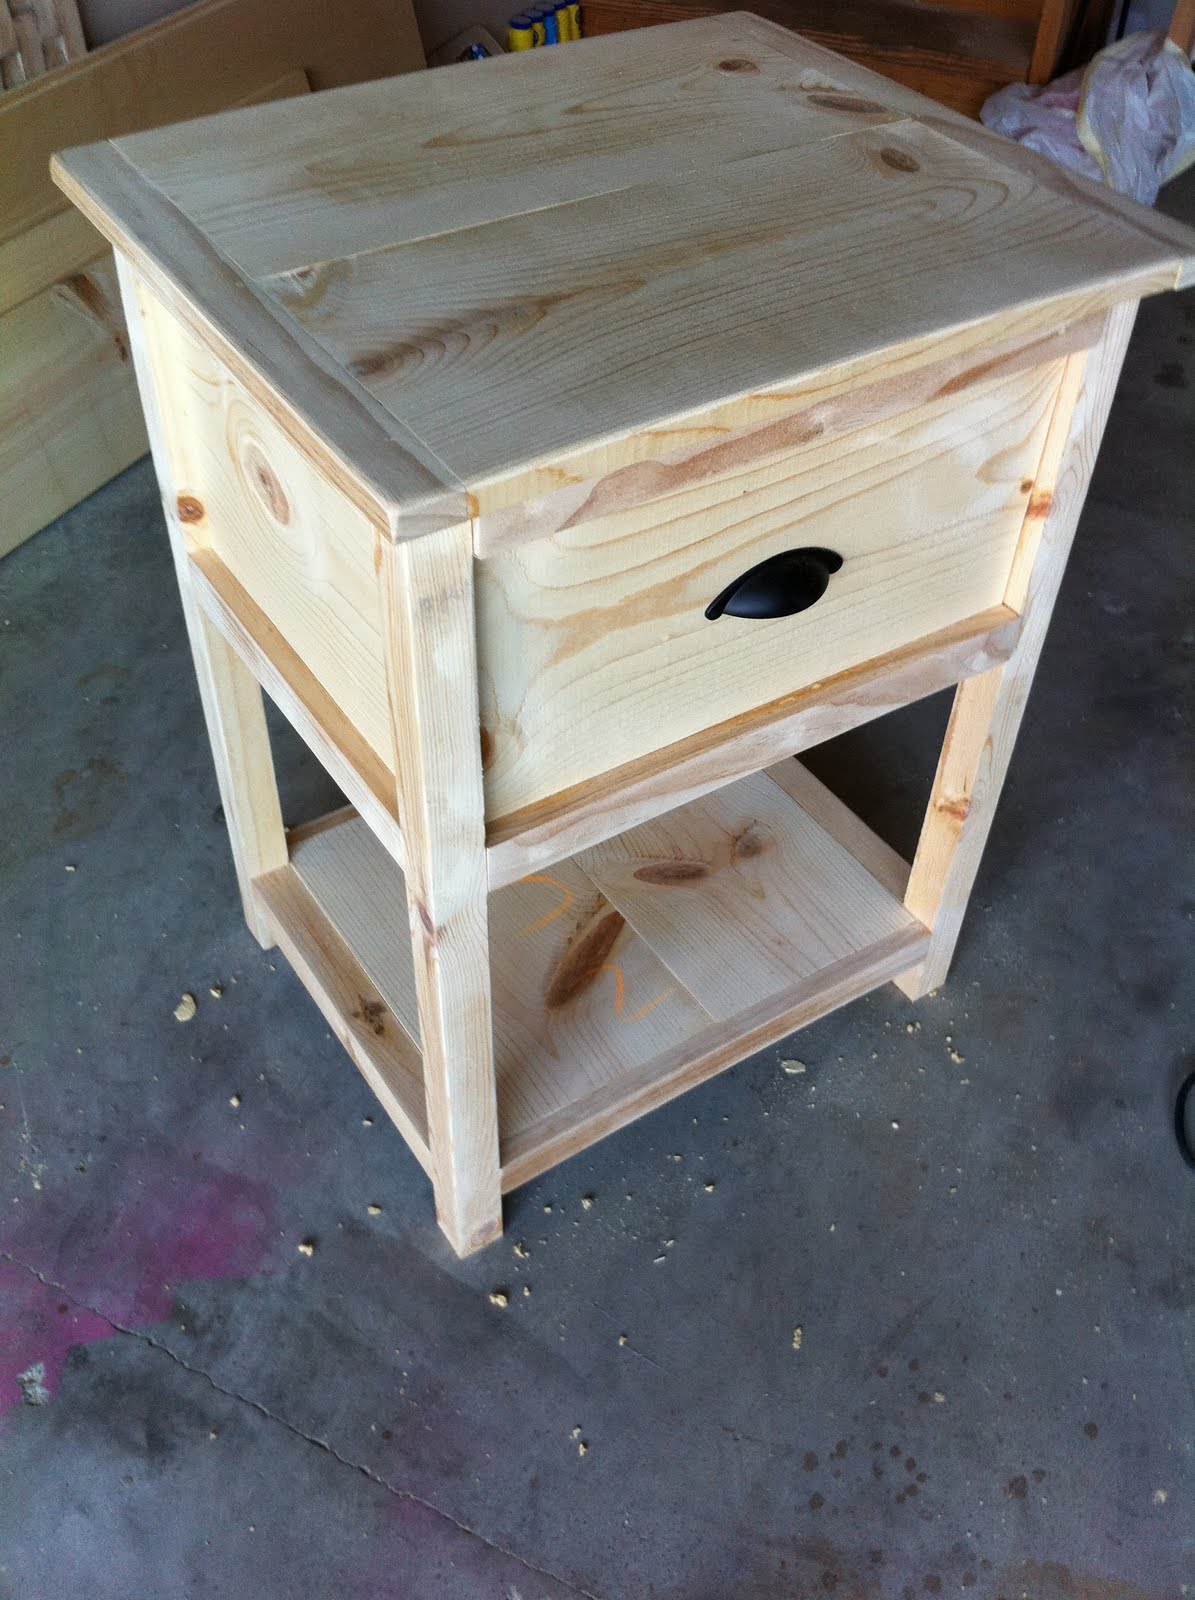
Cut List:
4 - 1"x2" - 13" Side Trim
4 - 1"x2" - 19" Front & Back Trim
2 - 1"x12" - 13" Side Panels
2 - 1"x12" - 19" Front & Back Panels
4 - 2"x2" - 27 1/4" Legs
2 - 2"x2" - 13" Side Trim (Bottom)
5 - 1"x2" - 19" Bottom Shelf Supports
2 - 1"x10" - 14.5" Bottom Shelf
2 - 1"x10" - 20.5" Table Top
2 - 1"x2" - 19" Side Trim Table Top
2 - 1"x8" - 18" Front & Back of Drawer
2 - 1"x8" - 12" Sides of Drawer
1/4" Plywood for bottom of drawer
Screws, Nails, Drawer Handle, 12" Drawer Slides


Link parties -


http://thediyclub.com/2011/08/august-2011-diy-project-party-monthly-contest/

Your table turned out so good! I wish I had your skills, I'd love to make a set of these. Thanks for sharing the awesome step by step pictures.
ReplyDeleteThank you Angie. I'm really happy with how it turned out.
ReplyDeleteThanks Alexis. I can't decide if I want to keep it white like the inspiration piece or grey. Hope to decide and finish it this week. :)
You're table turned out great! Thanks for such a detailed tutorial.
ReplyDeleteThanks Lindsey. The hard part is figuring out how to finish it. :)
ReplyDeletegood for you!!! that is so awesome that you just made the table! :) i am impressed!
ReplyDeleteThanks Cassie. Your sweet comment made me smile. :)
ReplyDeleteI'm just learning how to build stuff and I'm so excited about this project!!! Can you tell me what tools you used to build this? It looks like you have a Kreg jig, did you need a router for it??
ReplyDeleteThanks for the awesome inspiration!!!
@Anne I did use a Kreg, but you can use finish nails without altering the plan. A router is not necessary, but always adds more character to any piece.
ReplyDelete