DIY Deck Design & Build

Pin It For the past three or four years, we have had a major exterior project at the house each summer.  Last year, I swore would be our last project with the massive retaining wall on the south side of the house.  Here are some of the photos from Instagram (since I haven't been blogging).


Fast forward to this spring...I was pricing new deck boards for the small upper 10 x 10 deck.  The original cedar decking was sixteen years old and was not in good shape.  Over the years, I'd painted, filled the boards with an epoxy filler to try to remedy the knots/holes, sanded and there was nothing left to do to try to bring new life to the old boards.  Then, I added new railings to the plan, because the old ones would look horrible with the new boards.

You know how that goes, right?

Anyway, after sitting under the deck (on the lower deck) and staring up at the underside of the deck that was to receive the cosmetic face life with new boards and railings, I became worried.  I didn't know what "Minimum Code" requirements were at the time, but I was doubting the existing deck would even meet those.  The existing deck didn't have adequate lag screws in the ledger board (size or number), the railing posts were all toe-nailed to the joists (which explained why they wiggled), the joists were not blocked (which could explain why it felt like walking on a trampoline)...maybe it wasn't just the deck boards that made the deck terrifying, maybe it was the entire deck.


I dusted off Google Sketch Up and started designing a new deck.  Then, I went to the national building codes website, my city building code website and watched tons of youtube videos on deck construction.  Did this make me an expert?  Nope.  Did it give me the basic knowledge to build my own deck?  Yes!

After drafting the deck so I had a visual of it, I had a pretty good game plan for building a new deck.  Since I knew I couldn't do this project without help, I had to make sure my husband would be willing to do this with me.  He resisted replacing the deck at first, but after I asked him to walk on the existing deck and he refused, I knew he would help.  

The hard decision was how the handrails should look.  The old existing deck was up pretty high and the railings blocked the view.  We live in a subdivision, but we don't have any houses directly behind ours (good for view, bad for amount of wind we get).  When we sat on the deck, all we could see were railings.  I wanted to be able to see the yard and the trees, not spindles.

I found the cable wire line systems looked great and would allow the view, but the small dogs may be able to find their way through the cables.  Back to the drawing board...There are some nice black metal spindles at Home Depot and Lowes, but when you add it all up they are pretty expensive and still blocked some of the view....fast forward...I found a sturdy cattle panel fencing (utility fencing) that would act like the cable system, but would have less than a 4" grid opening.  Ding Ding Ding!!!
Cattle Panel/Utility Panel


Nothing was in our HOA rules about using metal on the deck (fencing may be a different story).  But, would the city allow the cattle panel?  During my research, I read that some cities wouldn't allow cable lines or cattle panel due to the horizontal (climbing) bars for small children.  I decided to stick with my decision on the cattle panel and had a back up plan to use 1/2" conduit bars if they wouldn't approve the panels.  The city approved it.  Yay!

Here is the beginning with the old deck and demo:  (My husband is great at demo, so I let him run that show with minor help from me - lots of sledgehammer and reciprocating saw action)

Original Deck
Original Joists

Original Corner Posts
Original Ledger Board


We removed everything down to the two posts.  The posts looked to be in great shape to use on new deck, but we waited until we removed everything and cut them down to the height we needed before making the final call.  When we notched them out for the new cross beam to sit on, we found the posts to be in perfect condition.  

Here are some photos from the build:


New Joists and Center Beam
New Deck Ledger Board
New Deck Framing

New Cedar Tone Pressure Treated Decking

New Railing with Posts on Deck

New Railings with Posts on Deck


Here is the finished project:
New Cattle Panel Railing
Cattle Panel Railing


Utility Fence Railing


Finished Deck
Underneath New Deck


And from the deck:
New Deck View

New Deck


As I said, I'm not an expert.  If I was, it wouldn't have taken three weekends.  The final deck is 12 x 10 (2ft cantilevered over posts) and cost about $1500 (includes running electrical to deck, all hardware, decking and utility panel) using cedar stained pressure treated wood from Home Depot.

Three days after the fabric canopy was put on the deck (meaning I didn't have time to bolt it to the deck), a storm blew through the region.  RIP Three Day Old Canopy, you will be missed.  Did I mention the wind tunnel syndrome behind the house?  Yep.  In my defense, it hadn't rained in weeks.  I thought I had time.  Anyway, bought another pergola type shade structure this week, with a canopy that retracts.  We will see how long that one holds against these winds.

Happy building!

Karen

Adding Square Footage

Pin It
For the past two months I've been posting my small outdoor accomplishments on my instagram account (yesterday was a glorious photo of one of the benefits to having a garden).


Sadly, I lacked the time to actually sit down and post about all of these mini-projects on the blog.

Now that it is complete, I'm going to have a few free minutes to spare to share these projects before jumping into a room makeover in the basement (for my new workout room). 

When I thought of all of the work I needed to do, I kept putting it off.  The backyard was a space no one liked.  It had been neglected over the years since we didn't like to use it (no shade and faces west).  

On Mother's Day weekend I bought myself a few new shrubs to tidy up the bed next to the patio.  It was overrun with weeds, covered in ugly landscaping rocks and the yard was creeping into the bed.  It was horrible.  After a weekend of cleaning, trimming, planting and mulching, I realized I needed to attack all of the projects the same way.  I didn't think of the entire project, I thought of each separate piece that made up the project.  Here are a couple of after pictures of the side bed (aka phase 1). 

Found the edge, removed landscaping rocks, trenched the retaining blocks with landscaping fabric (to keep said edge), planted crepe myrtle and evergreens that will eventually give some privacy, mulched.


Expanded patio with pavers


If anyone is looking for ideas, but doesn't know where to start, my suggestion is to start small. 

1)  Break all of the projects down into phases, based on cost and time frame.
2)  Research ideas on the internet for inspiration.
3)  Learn as you go.  (Which I did with my retaining wall - I suggest marking the sprinkler heads prior to finishing a wall.  I'll get into that in my upcoming posts.)

Here is a picture of some of the things I did to my backyard (and upcoming posts I'll be sharing): 
Planter boxes, retaining walls, fountain, floating deck, garden. 

Do you have any big plans for your yard this year?  Did you tackle a project?  I'd love to hear what you have been up to lately.
Karen


New Entertainment Center

Pin It
I had a small village of components living around my television in the family room.  DVR, DVD, Playstation, Xbox, Large Speakers, small speakers, DVDs, Video Game & Controllers.  Sound familiar?

I spent quite of bit of time searching for the perfect piece of furniture (either to replicate or purchase).  Guess what?  It didn't exist.  Apparently, you need to purchase a four foot length console for the massive televisions and all the equipment and just make do.  Some of the "larger" sized units were around $500 and still not what I needed and made of MDF.  Yes, some of them have the huge wall towers to go over the television.  However, I have tons of windows and didn't like the look of a wall of stuff.

Here is my solution.  Unfortunately, this photo was take with the iphone last night when it was dark, so you will need to check back with the plans and the "good" photos soon.  This will give you an idea of what is coming.


I know this picture is horrible.  I will hurry and add a better one this week.

This one is a bit better, but still with the iphone


For comparison purposes, this is a 46" television (which the hubby claims is now too small - Ha!).

Top row holds the DVD, DVR, Playstation & Xbox
Center row holds the smaller front speaker and has room for decor.
Center bottom houses the large speaker (hidden) and four rows of DVDs.
The two end spots are to hole large wicker baskets to hold video games and equipment. 

No more clutter!

Here is what I had before.  Looks kind of wimpy compared to the new one.

Here are a couple of the build:  I used Purebond plywood

I am so pleased with how it turned out.  I will share plans for anyone needing ideas for their own build.  Also, I will have more projects starting soon for the family room (adding wall planks and building a new coffee table to hide more DVDs).  I'm beginning to think I have too many DVDs and need to get rid of some.

Karen :)

Cozy Additions to the Family Room

Pin It
Comfy, cozy additions to the family room.

New homemade furry and knitted pillows with the Ikea Pillow and throw.

Photo Bomber - Max the Morkie

Well, I jumped into the family room(taking a break from finishing the half bath-no judgments please) to do a few things to make the room more inviting during the summer while we lounged inside watching movies and avoiding the heat.

Last week, I posted on Facebook that I found a new rug on Overstock.com for a steal at $148 for an 8x11.  I jumped on it even though I wasn't a huge fan of the chevon pattern.  My goal was to add a bit more color and this did not have brown or beige, so it was actually perfect.

It was to replace the jute rug (below) that my family hated.  If you notice in this picture, the theme of the room was The World of Blah Beige and Brown.


Last night I made two new pillow covers for the sectional.  One furry, one knitted.

I found the furry fabric on ebay and I used a soft baby chenille yarn for the knitted one.


Here is the furry one, which Max the Morkie actually hates.  He barked at it for the first five minutes it was on the couch.  Maybe it reminded him of his father or he thought it was his competition.


Here is the knitted one.  It would be much easier to make with a sweater from Goodwill, but I couldn't find one I liked with soft material.


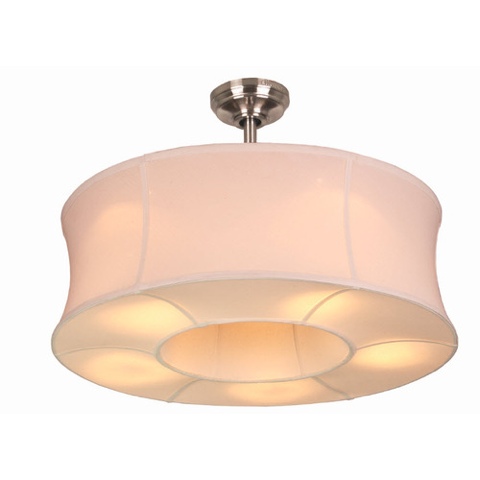
Here are two thoughts for a new ceiling fan, both from Lowes - Allen Roth.  I think the second one is more casual, which is a better fit for my house.


I swapped out the dark brown curtains with the ones from the front living room.  Free!  And I am loving how light and bright the room looks with the change.  Here are a few before and after with the lighter curtains.  The room actually looks much bigger now.

I need to reupholster the ottoman, but I will be repainting the walls and covering the popcorn ceiling too!  (Last room with popcorn on this level)


I plan to do a bit of work in the half bath to finish it up this weekend.  I just hate the small finishing touches that seem so tedious, don't you?

See you soon!  Karen :)

Linked to:

Back Home from Vacation

Pin It
As I mentioned in a few previous posts, my family and I spent some time at the beach this month.  The weather was perfect the entire trip - we were very lucky.  I constantly had my Kindle in my hand and read over ten books when I wasn't swimming and hiding from the sunball in the sky.  We used three or four bottles of SPF 50 & 80 and happy to report no major sunburns.  I can't say I'm happy it's over, but I was glad I missed TS Debby by a good 12 hours. 

Side note tip for taking your iphone or kindle to the pool or beach - use the snack size ziploc bags for your phone and a larger size bag for your kindle.  You won't have to worry about dripping water onto the screens or the sea spray/sand from the ocean.  It worked perfectly for me.

Now that I'm back and trying to get back in the swing of things with the blog, I thought I'd share some of my vacation pics.

Instead of just posting about it, I'd thought I'd add a feature on the blog to highlight anytime I have a fun picture to share with you. <insert drum roll here>

I added Instagram picture feeds!

In the picture below, you will notice I added the "Quaint Cottage" instagram feed on the top right of the blog page.  The Quaint Cottage instagram usually just focuses on all things to do with projects or adventures at the hardware store.  So, if it wasn't worthy of an entire blog post (because I don't normally just post things just for a single picture), you can find it here.


I also added my personal Instagram feed for anyone who wants to take a peek into my NON-blog world.  Again, I usually don't post things on the blog in reference to my own life or family just for the fact I started this blog as one to catalog my DIY projects. 
Although my life is one major DIY project all by itself if you ask me. 


Now that I've officially announced my return from vacation, I guess I need to get hopping on finishing some of my projects in the half bath and start a new mess in a new room.

I missed y'all!

Is anyone heading out on their vacation soon or just return? 
Did you chose to go to the beach or pick something else?

More to come soon.  Stay tuned.

Karen 


Half bath Bookshelf - Installed

Pin It
Last week I posted on facebook and twitter a picture of the bookshelf I was working on to install in the half bath.  Part of the post was just me whining about painint it because I do that.

Well, I broke down and bought a paint gun....and I didn't use it!!  What?!

I read the directions and it said to use when temperatures were between 45-90 degrees.  Working in the garage, the temps get much hotter than 90 degrees when the regular temperature is 90, so I didn't use it.


After I started priming this piece, I realized I didn't have enough anyway.  As you will see in the bottom photo, I made it about seven feet up and ran out.


So now in addition to finishing the priming and caulking, I need to paint it.  But, with the help of the hubby I was able to squeeze this huge thing into the small half bath and install it.  Then I added a little cubbie up top to give it more of a built in look.

I just threw some goodies on the shelf for now to see how it would work.


Almost finished with the room.

Have a great week!

Karen

Stacked Baseboards

Pin It
As I try to waste time this morning to avoid going in the garage to build the bookcase for the half bath, I'd thought I'd answer one of the emails I received from a reader.

I've lived in this house for over ten years.  According to my master plan when I moved in, I should have completely been finished with all my remodel projects by now....finished the basement and possibly have an in-ground pool.  However, when I tend to remodel over and over until I think I've got it right things take a bit longer than I plan.  The only thing I have going for me is my overwhelming need to keep the structure as classic as I can.

By classic, I'm referring to the oak wood floors, trims & molding, windows, doors, etc.  The "structure" things you shouldn't really need to change when you remodel a room around a new comforter you purchase.  Classic white trim and oak wood floors (in my eyes and heart) will always be in style.

A reader spotted these baseboards in a photo of an end table I did last year.

Hallway to family room from front door

When I started installing the 2000+/- square feet of wood floors about three or four years into living here, I was sitting on the couch with a Pottery Barn catalog on my lap.  I don't have it anymore or I'd show you the picture of the inspiration.  While flipping through it I saw one of their beautiful pieces of furniture, but that isn't what caught my eye.  It was the stacked baseboard behind it.  I had to have sat there for an hour trying to figure out how to recreate those same baseboards.  But the thing that kept halting me was the fact their baseboards looked like a 1x12 board routed with beautiful grooves to create a piece of art.

Then, I set down the catalog and headed to my hardware store for therapy (Yes, I like to hang out in the lumber section to clear my head.  Some girls shoe shop, I buy lumber.  Don't judge).  I started picking up pieces of trim molding and inspecting them.  I brought home about five different pieces and began to create.


Hallway

But, when the dust settled, this is what I ended up doing.

1 - Top piece 1 1/4" Picture molding
2 - Middle piece 1" framed rope molding
3 - 5" baseboard (which I'm certain you could create with two separate pieces)

Unfortunately, it was BB (before blog) so I don't remember item numbers, prices, etc.  But, if you have read this blog before you know I'm all about creating something special on a very thrifty budget.  I wouldn't have bought the high end $5 a linear foot stuff.  When I win the lottery (because I will someday, I just know it) I will probably still have the same need to recreate things on a budget I will just have way more time to do it.

I measured 11.5" up from the floor (same as a 1x12" piece of lumber) marked around the room with my tape measure and level and installed the picture molding.  Then I marked 8" up and repeated the process with the framed rope pieces.  Then I installed the baseboards.  I don't think it matters if you start at the top or the bottom.

Then, caulk, prime and paint.  I do remember the day I painted mine I had the Cardinal v Brewer game on in the background.  It was hard to pay attention to cutting in with the distraction.

Front Living Room


I still have some requests to see the kitchen (which was also a total gut before the blog).  I haven't forgotten.

Have a great day!!!

Karen

Linked to: