Half Bath Inspiration Board

Pin It

This is a quick post to show the direction I'm heading with my current project. 

Presenting.....my inspiration for the little half bath remodel. 

Currently, the room is a party of blah beiges - beige floor and beige walls & ceiling...Do you hear the big YAWN?! 

I'm hoping by adding the overhead light, along with the crisp white bookshelf and white plank wall & ceiling it will brighten the room a bit.

I'll be building the small bookcase and the rustic vanity to save money and get the exact size I need, but I'm still on the lookout for a vintage door.  I'll head to the Habitat Restore next weekend if I can't find one on Craiglist before then.

For now, I'm waiting for the planks adjust to the house temps/humidity and for the sink to arrive from Overstock.  While I wait, I'll draw up the plans for the two items I need to build and create a frame to reuse the current oval shaped mirror.

Stay with me.  Tons of good stuff to come.

Link to Pinterest Board

Karen

New Pages Added

Pin It

You may have noticed how difficult it has been to search for your favorite DIY projects on the blog since it is growing.  I even find it challenging to find a previous post and I made them.

Frustrating times have come to an end my friends.

I've listened to your requests and added NEW, EASY to navigate pages with photos of all of the projects at a glance.  I'm even slowly adding a "House Tour".  I hope to add the BB (before blog) kitchen to the house tour soon.


I still need to line up the photos on these new pages and make them look neat and orderly (if there was a power tool for blogging, I'd be a professional).  But, look how easy it is to find a project and click the link under the photo.

Hopefully, you will find a project you haven't seen yet now that you can see them all at a glance.

Karen

Swiss Cheese Anyone?

Pin It
This is a tale of my short trip into madness. 

If you have ever tried to run electrical lines in the ceiling of the first story of a two story house, you will feel my pain. 

When I ran them in my kitchen a couple of years ago, I don't think it was this challenging.  Maybe it is like childbirth, you forget the pain when you see the finished result?

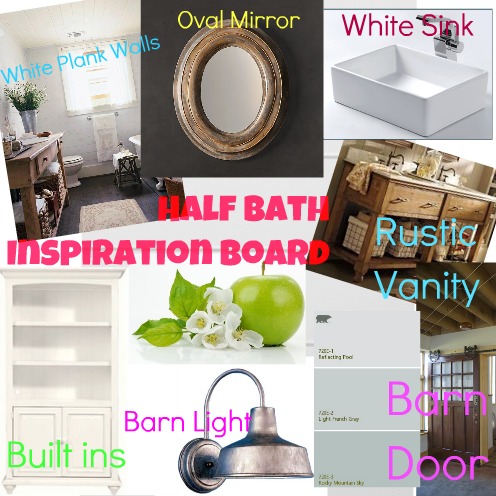
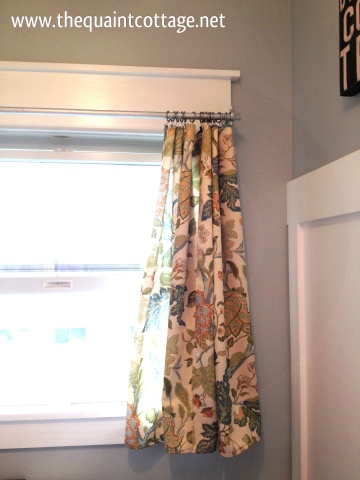
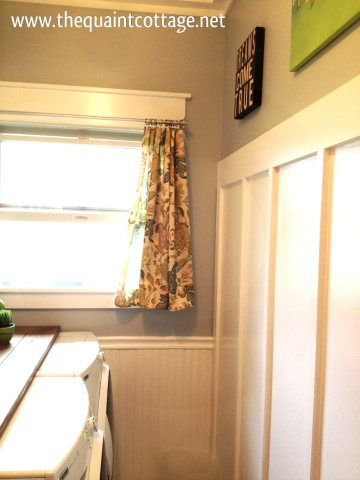
I set out with the goal of adding a bit of light to this small, one light fixture/no window 6'x6' half bath.  (If you remember, the idea was just to freshen up the paint in this room, but I'm so past just a coat of paint now.) 

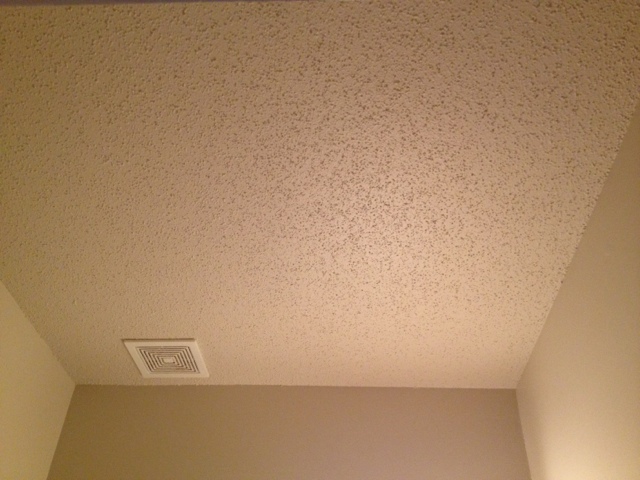
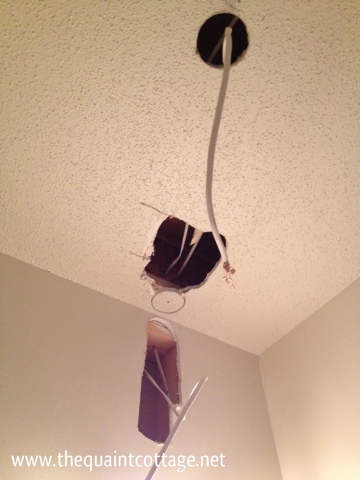
This is the ceiling.  Isn't that some pretty popcorn on the ceiling? 

I know.  Don't worry. 

This is the second to last ceiling on the main level with popcorn I need to tackle - aka I will soon stop talking about it all the time and move on to another pet peeve.


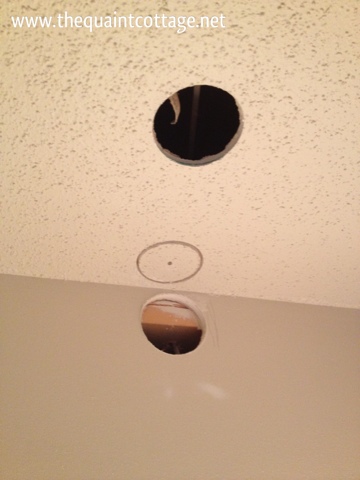
Here is step one of the madness - make a few holes to run a line from the light fixture.

Easier said than done on this ceiling. 

Double header, joist an inch inside from the header (fail on first ceiling hole)...ugh.  I sent my co-worker a text asking if she had any ceiling art work I could add to just scrap the project.


No turning back now. 

Next step - I press on to get access to the wall so I can drill through the header.
Note - I don't have fancy drill bits that all the cool electricians own.  They probably have lasers and magic too, so I am a bit jealous of them.


Take a step back and figure out a game plan...What?  Do you plan BEFORE you knock holes into walls.  Geez, that sounds boring.

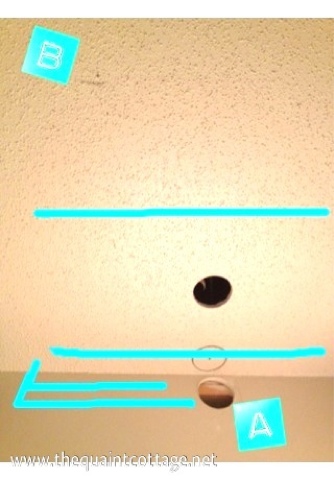
Game plan (with cool coach diagram):

Wire needs to go from point "A" to point "B", through two joists and then weave around a rogue air vent added by the builder ten years ago for the exact purpose of messing with me today.  Those prankster HVAC guys.  Haha!


So, instead of running to the hardware store to get the drill bits I need and spend $$$, I remembered I planned on adding paneling to the ceiling AND the back wall behind the toilet and sink....maybe I did plan it after all.

In honor of the Marvel comic books, I went Hulk on the drywall...

Well, if Hulk used a keyhole saw?

Then the final step of the day, thread the new electrical line.  The fishing line (not the fancy name electrician's use) where you tape the line to the metal wire and fish it thru the holes didn't want to work either.


I am waiting until Saturday when I can devote the whole day to installing the paneling on the ceiling and the wall before I install the lights.  I mean, that would just be silly if I didn't wait.  Right?

You are welcome to set down your soda now and burst out laughing at my drywall.  I did.

See you on Saturday.

Karen

Disclaimer - this is a blog of my projects, not an instructional how-to blog.  Please use it for your entertainment and do not attempt to make this mess in your own home.

Road Block on Dining Room

Pin It Last week, I made a little inspiration board for my new dining room that will be converted into a library/office. 

On the board, there were these two tall, rustic, glass door bookcases that I thought set the mood for the whole room.   


Here is a closer look.


Then I found out where these bookcases could be purchased and knew I couldn't afford to buy one ($1800), let alone two.  So out of my budget.  Big old Sad Face everyone :(:(:(  

Although, now a $600 Orb Light I saw on Restoration Hardware doesn't sound so expensive.

Of course, then I set to pricing the hardware (Cremone Bolts) so I could replicate my own bookcases.  Ouch!!!  Those bolt prices ($175 and up for one) could explain the price of the bookcases.


Source - $420 bolts
 Long story short - While I was searching for affordable Cremore Bolts, I think I found a way to recreate these cabinets, with a similar look for a fraction of the $175+++ bolts.

I see a tutorial in the works for some rustic bookcases, don't you? 

Until then I just need to post some of my current furniture on Craigslist to make room for the new stuff. 

Karen :)

Inexpensive Window Hardware

Pin It

Today I did some simple curtains for the laundry room and hung them.

However, when I was shopping for curtain rods and hardware I was a bit shocked at the prices.  For a small window like this one, it was going to cost anywhere from $50 on up for simple hardware  ($20 for brackets and $30 for the rod). 

As I was trying to play off the industrial metal backsplash, silver cabinet handles and the metal accents I put down the curtain hardware and decided to check out the plumbing section of the hardware store.

Until I found this...


It looks like curtain hardware to me.  Here are the product packages for anyone who is interested.  The flange and split ring hanger are in the plumbing section, the threaded rod is in the screws and bolts section. 

Then add your favorite conduit or spray painted wood dowel.

They even have pipe end pieces to add for finials, but I wanted this simple look.
Here is my new $10 curtain rod, including the hardware. 
The little clips were another $5.


What do you think?  Would you use plumbing for your window hardware?
I like it so much I may use it in my upstairs hallway (spray painted oil rubbed bronze).

Karen :)