Popcorn Ceilings are My Enemy

Pin It Today I spent four hours scraping popcorn from a small 10'x10' room. If you have done this before you know it is very time consuming and messy work. However, this ceiling had a multi layer paint amour trying to conceal it which hindered the water penetrating the layer of popcorn.  Normally, it would only take about two hours to scrape this size room. 

How do my arms feel after scraping for four hours? Like jello. But, now I'm resting up for an entire day of installing hardwood floors because these arms are going to be screaming using the heavy hammer to nail them down. But trust me, I'm not complaining. The finished product is always worth the work.

If you have never scraped popcorn and are thinking about it you need to understand two important things. 1) It is VERY messy and 2) I'm a bit crazy when it comes to these things. What may not be a big deal to me may not work for you.  I'll let the pictures help you decide.  Neat freak folks may want to brace yourself.
Finished Ceiling   (I'll prime it in the AM before I start the floors)
Here is the ceiling after I started to scrape without water.  If you try to add water to a painted ceiling like this before adding the holes (where the popcorn was knocked off) you will be wasting time and water.
It took me a half an hour to just get an opening started (spraying water and scraping)
It is starting to come along, but very slowly
Sometimes the angels are singing and you can get a piece going (adding water at the edge on the ceiling)

 
Use the drywall trowel at a 45 degree angle pushing away from you on the ceiling, kind of like scraping ice from your windshield but over your head (sorry warm climate people for not understanding this reference).  Be sure to keep it flat.  If you use too much pressure on an edge or if you aren't at the correct angle, you will rip the drywall paper or create a hole.  You can always go back and patch, but you want to avoid it to save your time.  Start slowly until you get the hang of it.
By the way, this was my less used arm after only about 12 square feet.  I couldn't even touch my phone to take a picture after that.
Be prepared for a horrible mess.  If you aren't planning on ripping out carpet, you will need a tarp or plastic and a drop cloth over it.  Leave a towel on your ladder to wipe down the excess water that will run down the walls.  Also leave a towel at the doorway where you can kick off your shoes.


I think of it as an awesome arm workout...for four long hours.

These are the tools you will need - drywall mud trowel, ladder and water sprayer (it is over by the dresser, I think they can be found in the lawn and garden or bug spray area of the hardward store)  If you try to use an ordinary water bottle, it will take you a long time.
Ready for the leg workout tomorrow.
Sweet dreams :)

Special Note:  If your house was built before 1978, please have a test done on the material before you remove or disturb.  Lead paint and asbestos could be used in the ceiling materials and/or paint of houses built before the law changed.  My house was built after that and all of my previous houses (built before 1978) didn't have popcorn ceilings.  I think it was more popular in the 80's and 90's for this texture.  Better to be safe, so if you are uncertain, contact a professional. 

Woven Jar Cover Tutorial - Giveaway!

Pin It
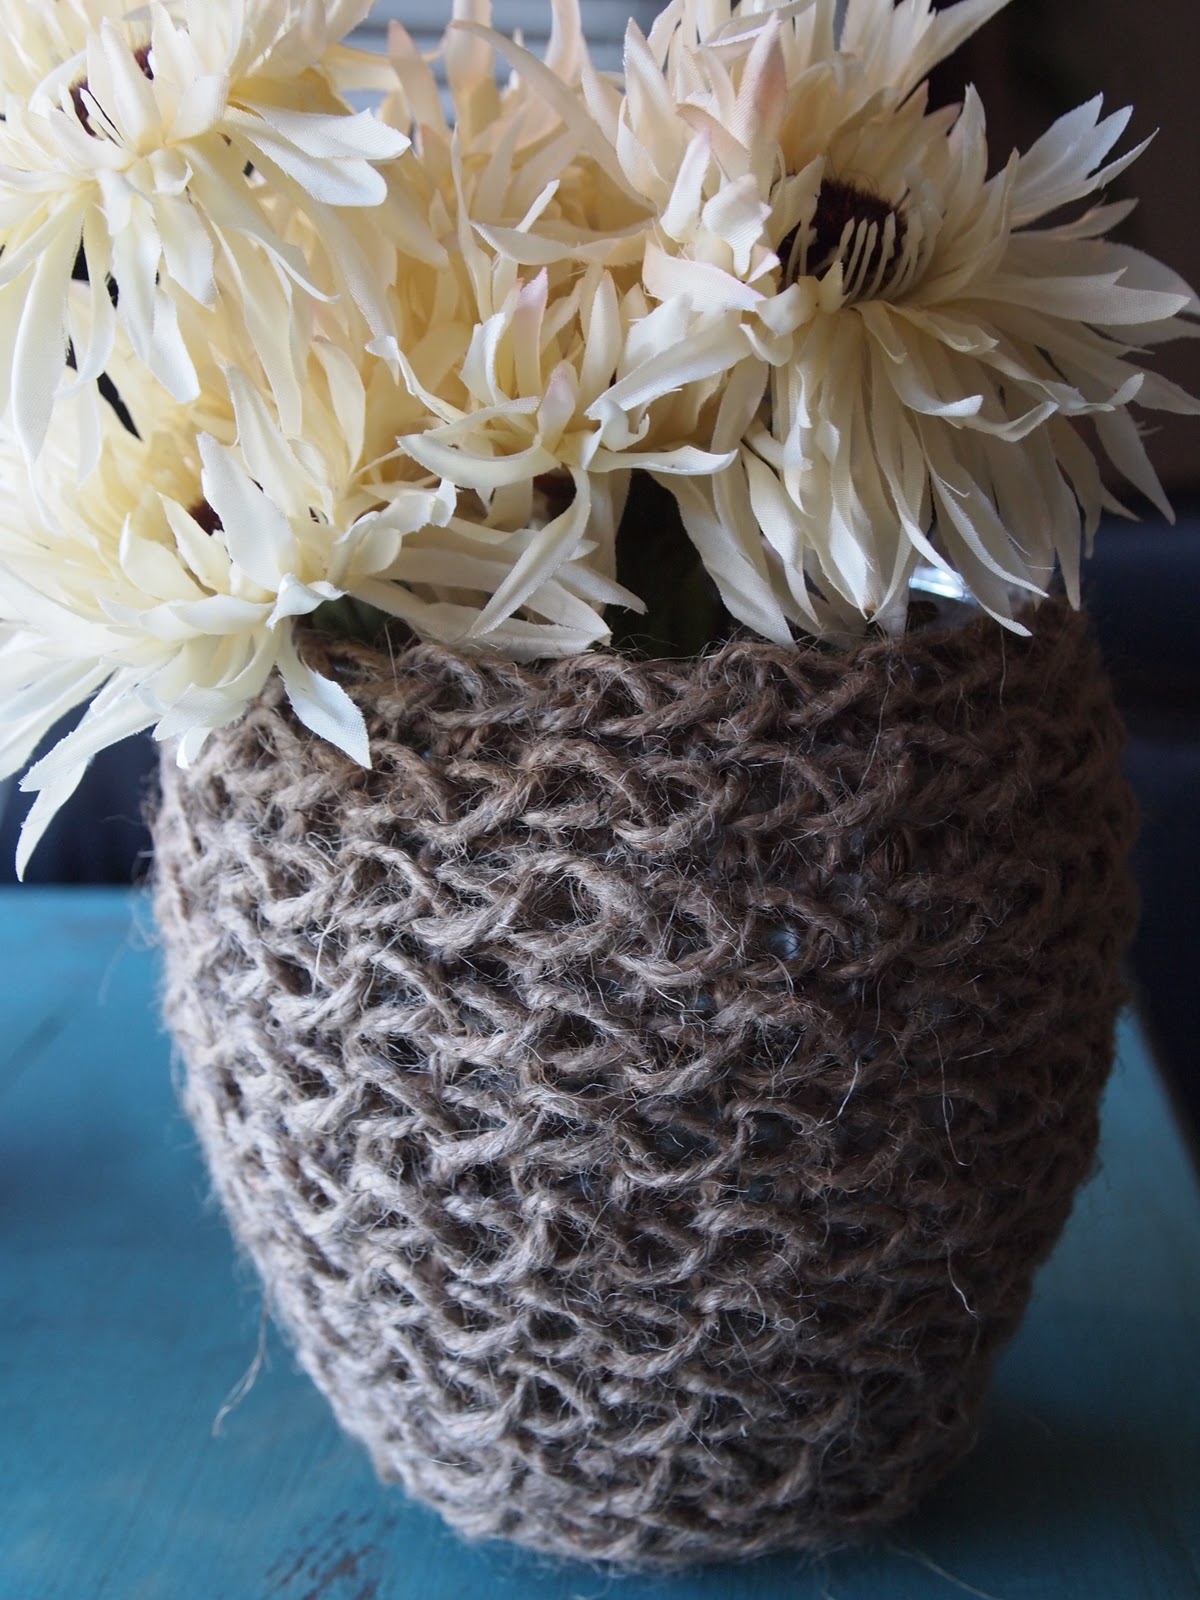
A couple of weeks ago, I posted a Restoration Hardware Knock Off of a woven vase (above).  I promised to add a tutorial if you wanted to learn and I had several requests.  I'm going to try my best.  I'm pretty sure a video would be better to explain, but here goes.... 

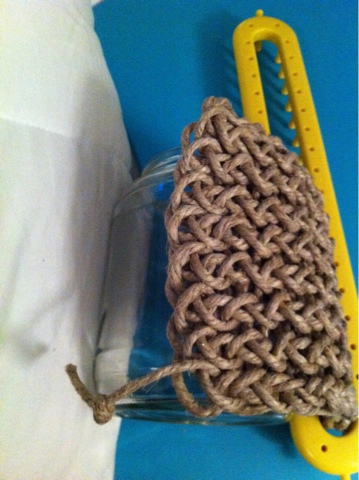
First, tie the end of the yarn to the peg board (original post I used twine which is harder to do than yarn-this post I used hemp, but I won't ever use that again too rough and not stretchy).  The hemp is very heavy and sturdy, but it is hard to move over the pegs and not easy to learn this project.  I would suggest you use yarn to learn the technique.  If I had tried to learn with twine or hemp I would have given up immediately.

You are going to loop the yarn between peg 1 and 2.  Wrap over peg 1 counter clockwise and up and over peg 4, clockwise.  Repeat this for approximately 8 or 9 rows (determine the number of rows by holding the pegs up to the jar, wine bottle, your own neck for a scarf, etc).
Loop back down the pegs to the starting point.  You will have one on each end that will only have one row of yarn and it will alternate each time.  This is correct.
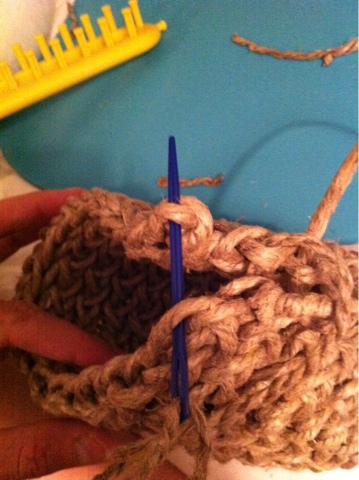
After you have two rows of zig zag yarn, you are going to loop the bottom yarn up over the top yarn with the hook as shown below.  When you have both sides complete, push the row to the bottom of the pegs and start another row. 
You will keep repeating the rows and the looping until you make the length you need.  You will need the yarn to be able to stretch completely around the jar so you can stitch up the seam.
When you have enough rows, take side "A" and place the loops onto side "B".  Bring the bottom row up over the top row. 
Cut off enough of the yarn to loop up and back down the seam.  Run the yarn through the beginning end loops and the ending loops to stitch them together.
Wrap it around the jar, adjust the tightness.

I'm giving away this sample hemp woven jar.  If you would like to have this wonderful textured handmade piece for your collection of vases or candleholders, please comment below (and follow me here or on facebook).  Hopefully, one person will comment to win.  If more than one person comments, I'll use a random number generator to select a winner on October 30, 2011 8pm CST.
BEWARE!!!  If you have any questions about this post and comment, you will be entering to win!  Hahahaha
Thanks to each and everyone of you who follows this blog.  I like you because obviously you have awesome taste in blogs.

Easy Homemade Toaster Strudel

Pin It
Okay, it isn't really a "toaster" recipe, but it reminds me of those little refrigerated ones you buy at the store.  Only better.  Since it is now Fall and officially time to start eating every apple treat known to man without fear of judgment from others, I made this.


What you need to make this extremely easy dessert/breakfast:

Dough-
Phyllo Dough (1 roll) Room Temperature
Melted Butter

Filling-
6 Granny Smith Apples, peeled and sliced
1/2 Cup Sugar
1 Teaspoon Cinnamon (I may have added a bit more, but I love cinnamon)
1/4 Teaspoon Nutmeg
Pinch of Ginger
Tablespoon Flour


Combine all the filling ingredients and simmer on stove top (low/medium heat), stir often.

While the filling is cooking, lay out a sheet of the phyllo dough and lightly coat with butter.  I used the full sheet, but you can make individual mini strudels if you prefer.  When you are about halfway finished with the 1 roll of phyllo, place the cooked apple filling into the middle of the dough.  Spread around.  I left about a half inch at the edge without the apples so they wouldn't escape.

Finish layering the dough (coating lightly with butter).  Cook the strudel at the temperature on the box of Phyllo for approximately 12 minutes or until golden brown.

You can also add a glaze on top, but the apples were so sweet I just added a sprinkle of powered sugar.


Sorry I didn't have more pictures to show you.  It was just something I threw together one evening last week on one of those beautifully chilly nights.  This will warm you.