Ideas for Upcoming Projects

Pin It
The last few weeks, facebook had the blue end table (below) on the side of my page advertising a website that sells furniture. 

How did facebook know I would really like it?

Well, I did.

I went onto the website to check out their products and fell in love.  However, there were problems. 
 A) Most of the pieces I liked were sold out and B) Many of the pieces were several hundred dollars. 
I tried to PIN the stuff I liked onto Pinterest, but their website did not allow such activities.  :( 

Anyway, you can check these out at http://www.onekingslane.com/

Aren't these distressed pieces amazing?  Too bad they were sold out...I may just need to use these as inspiration pieces and create some of my own.


So, to answer the question.  Yes, I posted these here so I could pin them for future reference.  I hope it isn't a problem?  :)

31 Days Challenge - Simple Wood Projects

Pin It

The Inspired Room will be hosting a fun event during the month of October.  It is a fun challenge to post on a certain topic everyday for 31 days, the entire month of October.  The participants will share their fun ideas and awesome projects revolving around their selected theme or topic.

Well, that sounds like fun!  Doesn't it?

Even though many of my projects are a bit long and time consuming...I decided the event will be something truly motivating to me.  Like most Type A people, I work well under pressure of deadlines and having a guideline from a specific topic.

Which topic did I pick?  Woodworking.  What else? 

Unfortunately, I am better with a nail gun than a glue gun.  Not that I don't own a glue gun, but I have had the same packet of glue sticks in my basket for about five years.  It only gets used about once a year.

I have read many of your comments (actually I read them all and love getting them and responding) saying how they would love to do a project, but don't have the skills to do some of them I share.  That breaks my heart. 

I wasn't born with a power tool in my hand and I'm quite certain that makes my poor mother happy since I was already a ten pound baby.  BUT, I did learn many things in my dad's workshop at a young age.  He was one of those guys who required his daughter learn how to do things for herself.  Somethings I embraced, like power tools and fixing things myself.  Somethings I ran from, like changing the oil and a flat tire.  You should have seen me and my friend on the side of the road trying to figure out how to get the spare tire down from its hiding place on the side of the highway...in skirts...during morning rush hour.  Yeah, it was awesome. 

Ooops, I'm rambling again. 

Anyway, I am going to prepare a series of 31 very SIMPLE woodworking projects.  One simple project everyday for the entire month of October.  I'm even going to recreate my very first project.

See?  Now that I put it out here on the blog, I have to do it.

At this point, I'm going to say the projects will be simple enough to use a hammer, nails and a handsaw.  Also, the projects MAY BE posted without paint or stain due to the time crush (just warning you in advance).  Hmmmm, that could lead to a November series on paint & stain techniques?

I'm working on my list of 31 projects.  If you have any ideas, please throw them at me soon before I start sorting through the supply lists and timeline.

Thanks for visiting.  Hopefully, you will follow me and stick around for the entire month of October (or longer).

Laundry Room Design Plan

Pin It

When we built our cookie cutter house, I didn't really put much thought into the laundry room layout and space.  At the time we only had two small children, so the amount of dirty clothes in the laundry room wasn't too bad.

I should probably point out, our laundry room has to serve double duty - laundry room and pantry.  When we remodeled our kitchen a few years ago there was this wasted mini cabinet and counter next to the refrigerator (see floor plan below).  I wanted to rip out the pantry (move it into the laundry room) and make a Baking Center.

Here is an idea of how I want the room to look.  Storage from floor to the top of the 9' ceilings, build a can good caddy, build tons of roll out shelves and most importantly...build three bays at the bottom for the laundry baskets to keep them from the middle of the floor.

See how the laundry room is long and narrow?  Kind of hard to work in that room, especially with front load machines.  It is kind of like a yoga workout when I do laundry.  Oh, and we removed the door to the laundry room from the kitchen.  I really don't know why there was a door there since you have to walk through that room to go to your car many times a day.  It isn't like you can just close that door and ignore the laundry.  Trust me, I tried.

I started a folder on Pinterest for the many ideas I have, but my space is very limited.


Can you think of anything else I should add to the laundry/pantry area?  I still think I'm missing something important.  I can't raise the washer and dryer up off the floor or it will block the window.  I really wanted to do that, but when it was built I added the window to put light in the little room.

I would love to hear your feedback and ideas. 

Thanks Karen :)

DIY Nightstand

Pin It
Here is my version of a couple of different nightstands I saw for sale on the internet from high priced stores.  I needed a home for my laptop, books (that usually just piled on the edge of my old nightstand) and a drawer for the little things that just kind of clutter up a table.

Originally, I designed the sketch up plans with doors over the bottom opening.  But once I had it together I changed my mind.  I also changed the middle shelf to one that just sits on clets.  I did add a large piece of plywood at the top to stablize the structure since it no longer had the middle support.  If I have time, I'll redesign the original plan so it can be done either way.

I used some of my left over stair tread ends for the table top, screwed together.
Filled the seams with wood filler.
Sanded extra smooth.
Stained with Special Walnut color.

Cut list for the plan below:
2 - 27 1/4" x 16" birch paint grade plywood for the walls (I had the store cut an 8x4 sheet into 3 equal 8'x16" pieces to make other projects and make it easier to transport)
2 - 24" x 16" birch paint grade plywood for the bottom and the middle shelves
2 - 24"  1"x2" for the top bracing pieces
1 - 25 1/2"  1"x2" base board piece
2 - 25 3/4" 1"x2" wall edge framing
2 - 22 1/2" 1"x2" Front edge framing
2 - 27 1/2"  1"x10" (or you can add reclaimed wood or make your own top)
2 - 21 1/2"   1" x 6" (front and back of drawer)
2 - 14"  1"x6" (sides of drawer)
1 - 22 1/2"   1"x8" (drawer face)
25 1/2" x 27 1/4" backing (optional - I left mine off to be able to run my laptop cord, etc.)
4 - 12  3/16"   1"x2"  Door sides
4 - 11  5/16"  1"x2" Door tops and bottoms
Optional - Attach the door frames to beadboard cut to fit frame or add plexiglass to the back of the frame or a chicken wire mesh or fabric
2 - 16"  1"x8" - Secure to the walls to bring them out to secure to the drawer glides
4 - Flush piano hinges for these light frames to make them as flush inside the opening as possible
2 - knobs for doors
1 - Drawer handle
2 - 12" drawer sliders
Finish Nails, screws, wood glue, sand paper, paint, stain, saw, safety equipment
Construct the frame by nailing or screwing the walls to the shelves.  Keep the bottom shelf up 1.5" from the bottom and the middle 11.5" from the bottom.  Secure the top 1"x2" bracing pieces.


Add the base board piece to the unit

Add the two front edge framing pieces

Add the top edge piece

Add the backing
Add the front edging and construct the doors.  Attach with the hinges.

Add the top.

Construct and add the drawer.
When I added the middle shelf to the top of mine, I added these clets for a removable shelf incase I wanted to add a larger basket down the road.


I stained the top and used white chalk paint and clear wax.

Linking up with:
The Gunny Sack
My Uncommon Slice of Suburbia
Home Stories A to Z
Tip Junkie
Not Just a Housewife
Gingersnap Crafts
Thirty Sixth Avenue
The Shabby Creek Cottage
House of Hepworths
Southern Lovely
Miss Mustard Seed
Perfectly Imperfect
Tatertots and Jello
Thrifty Decor Chick

Chalk Paint Finish - Buffet/Dresser

Pin It

Last week, I ordered some of the all-the-rage Annie Sloan Chalk Paint to figure out what the fuss was.  I mean, it took a ton of nerve on my part to spend that much money on a quart of paint, plus wax, plus shipping.  However, after seeing pictures of finished pieces and reading all the rave reviews...I was very curious.

I ordered the Paris Grey and the clear wax from Cottage Attitudes (entire North American vendor list link).


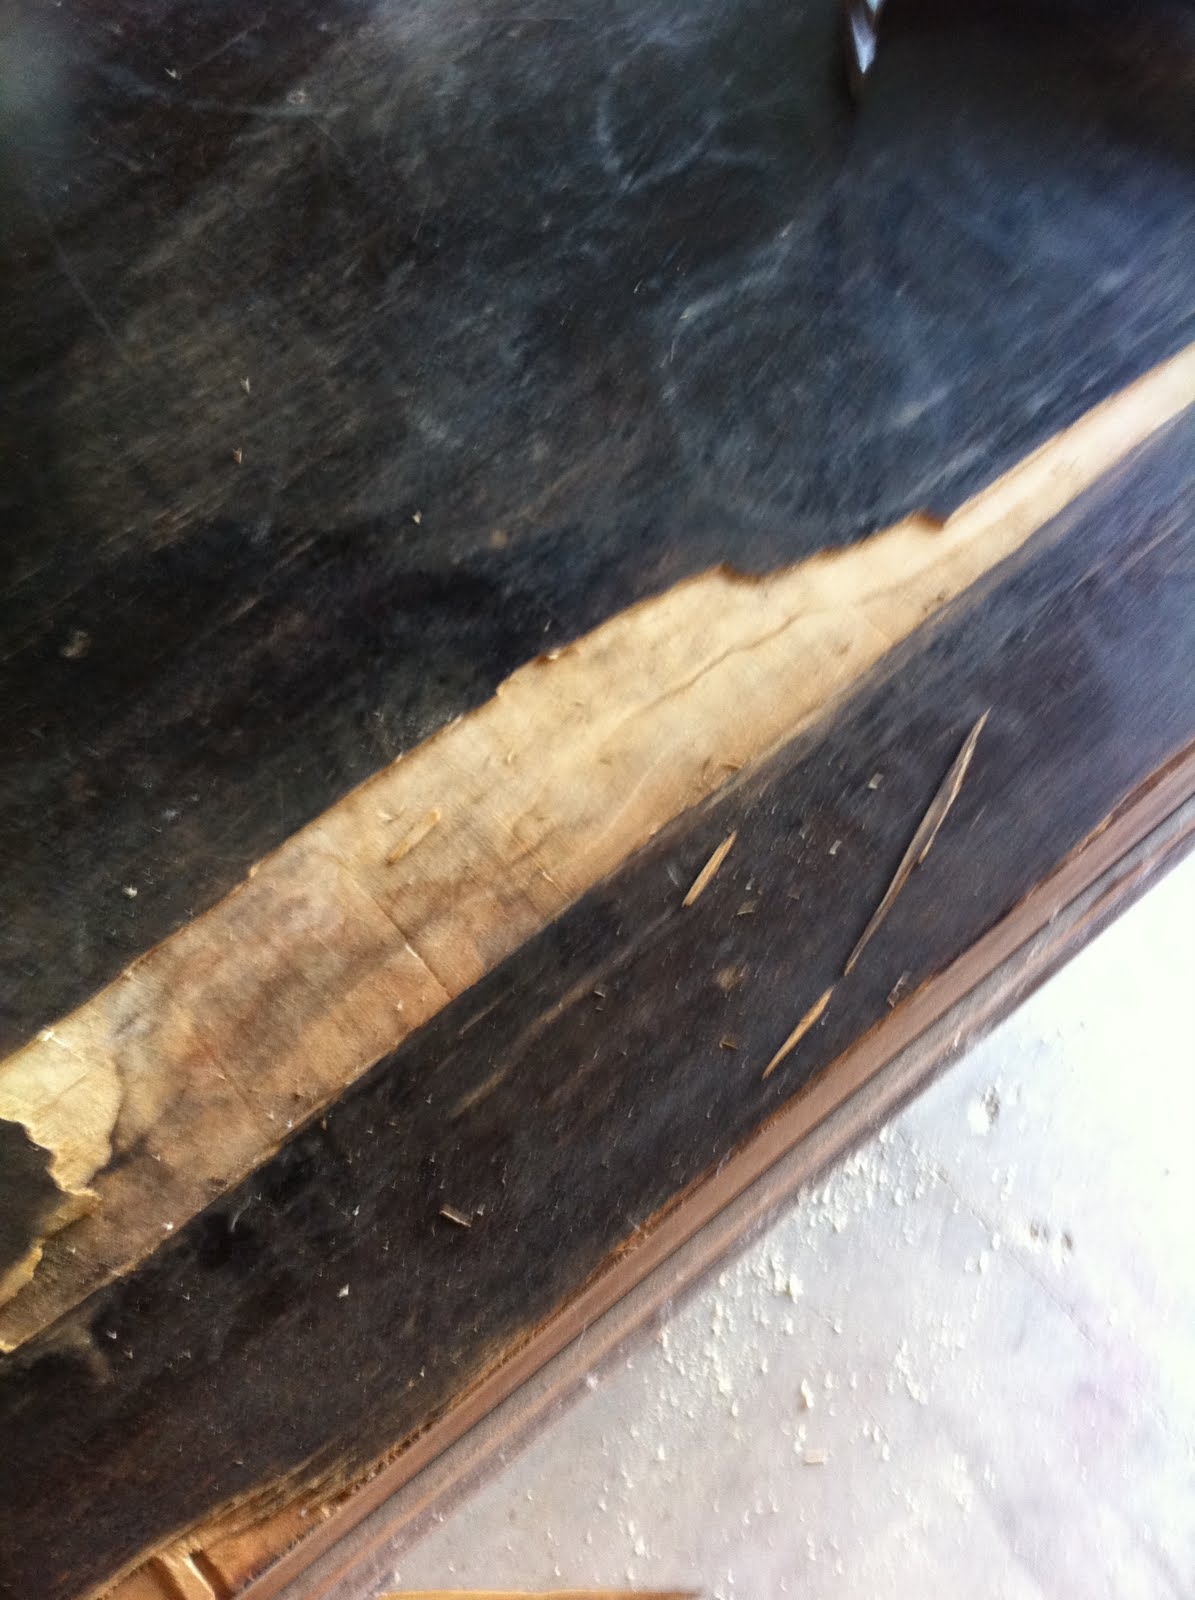
I bought this old piece on ebay several years ago.  For a long time, I loved the old look of it...but it needed an update.  The finish they had on it was some kind of chunky crackle finish.  And before you ask...yes, it was uber fun to sand. 


And it had these ancient VERY LOUD squeeky wheels that sounded like an ear piercing EEEEEEE whenever I needed to move it.


And the wheel house was rusted and really in the leg good.  I tried - only briefly - to remove them.  I had images of the little old legs breaking off before I could actually remove these rusted things.  So...


I bought new wheels from Lowe's ($2.97 for a pack of 2).  They were a bit larger, but they didn't squeek.  BONUS!!!


I removed the housing from the wheel so I could use the old rusted one that had at one point welded itself to the wood.


And then I tapped the new wheels into the legs.  YAY!!!  I did a happy dance in the garage.  It fit perfectly!!  Thank goodness they didn't radically change the size of these little guys over the past.


The top of the piece was water damaged and over the years I owned it, it just wouldn't stop flaking and peeling.  I was going to replace the top, but once I had it off I changed my mind.  I had the idea of flipping the wood and using the underneath.  It was the same wood finish, just not stained or sealed.  So what the top will have holes from where it was secured...I say it added character.  :)


Here is a photo of the side (where they hadn't gone crazy with the crackle).  This wood was pretty.  My husband was quite mad I choose to paint instead of refinish.  I say the wood is still under there and the paint can always be sanded if we ever want to change it back.  Right? 


And so it began.  I have to admit, when I first started brushing on the paint...I didn't see what the fuss was about for the expense.  It didn't brush on any easier than regular paint and in my opinion it may have only covered a bit better than the regular $10 a quart paint.


Here is a very of the side with one coat.  I did two coats.


I bought this little finishing sander for a smmooooth finish. 


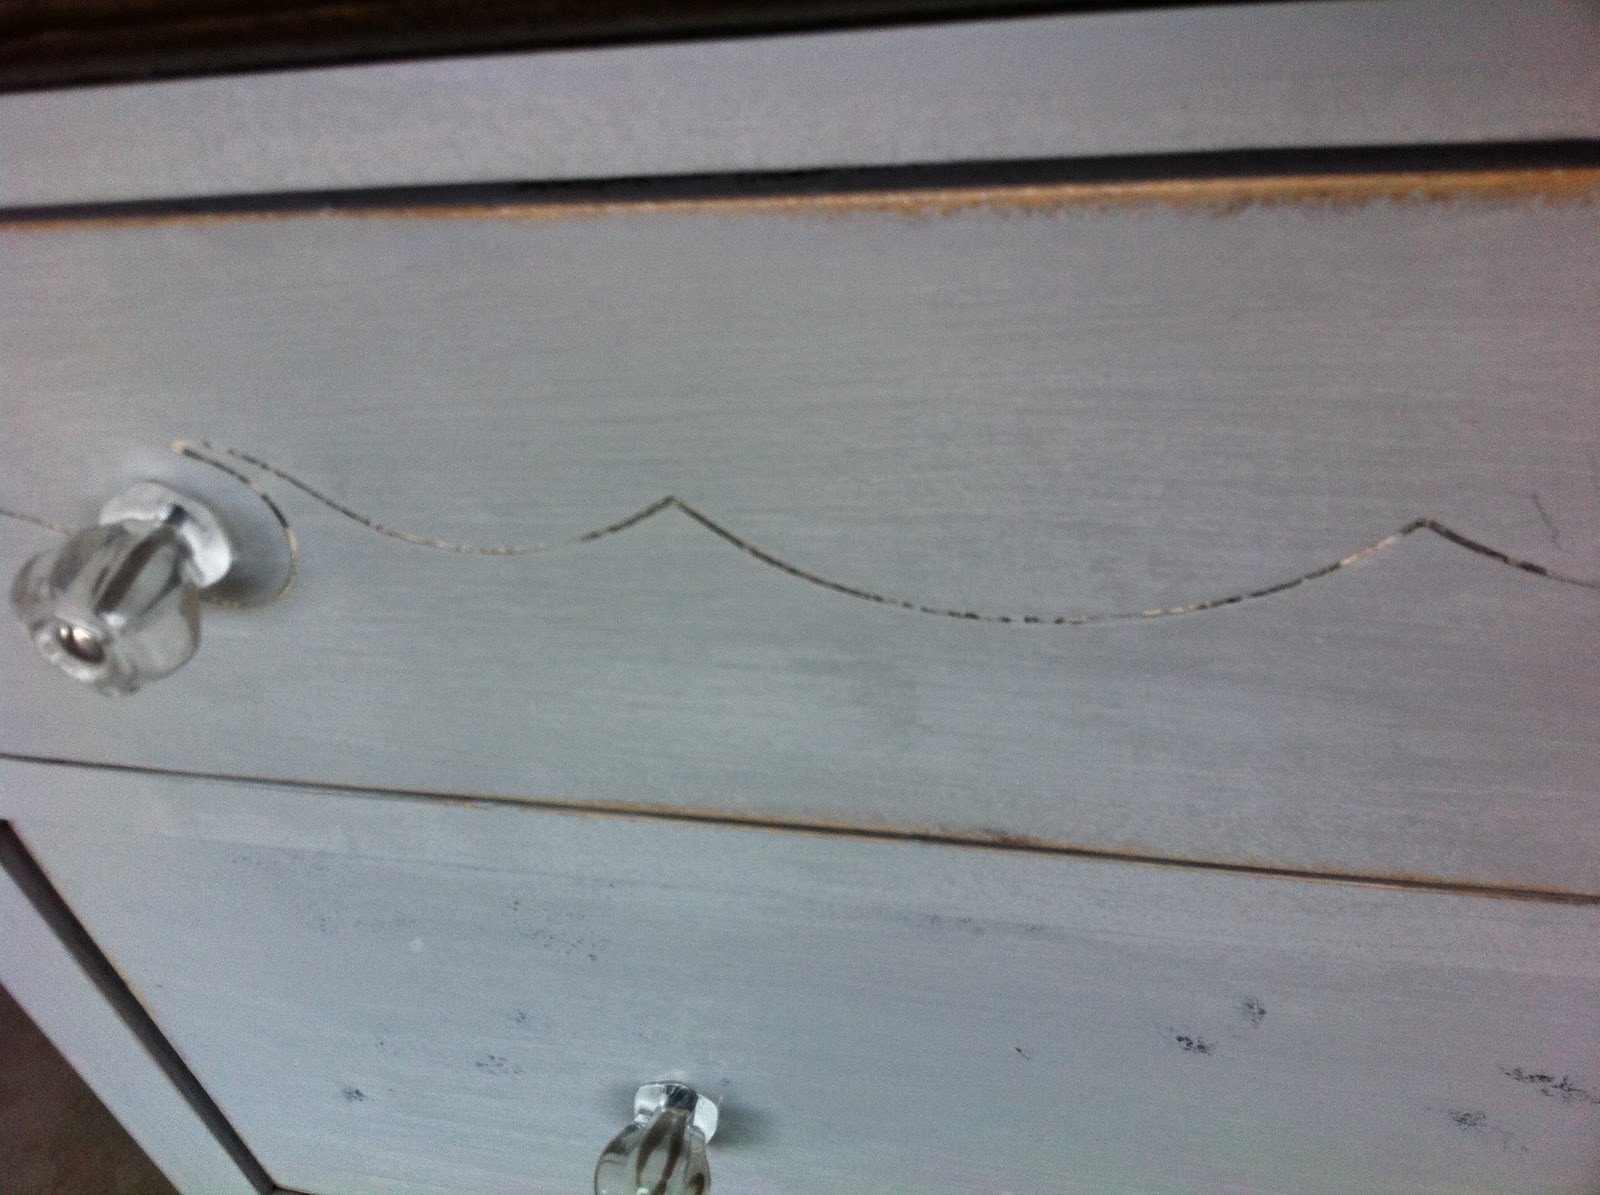
And these $4 knobs (x8)


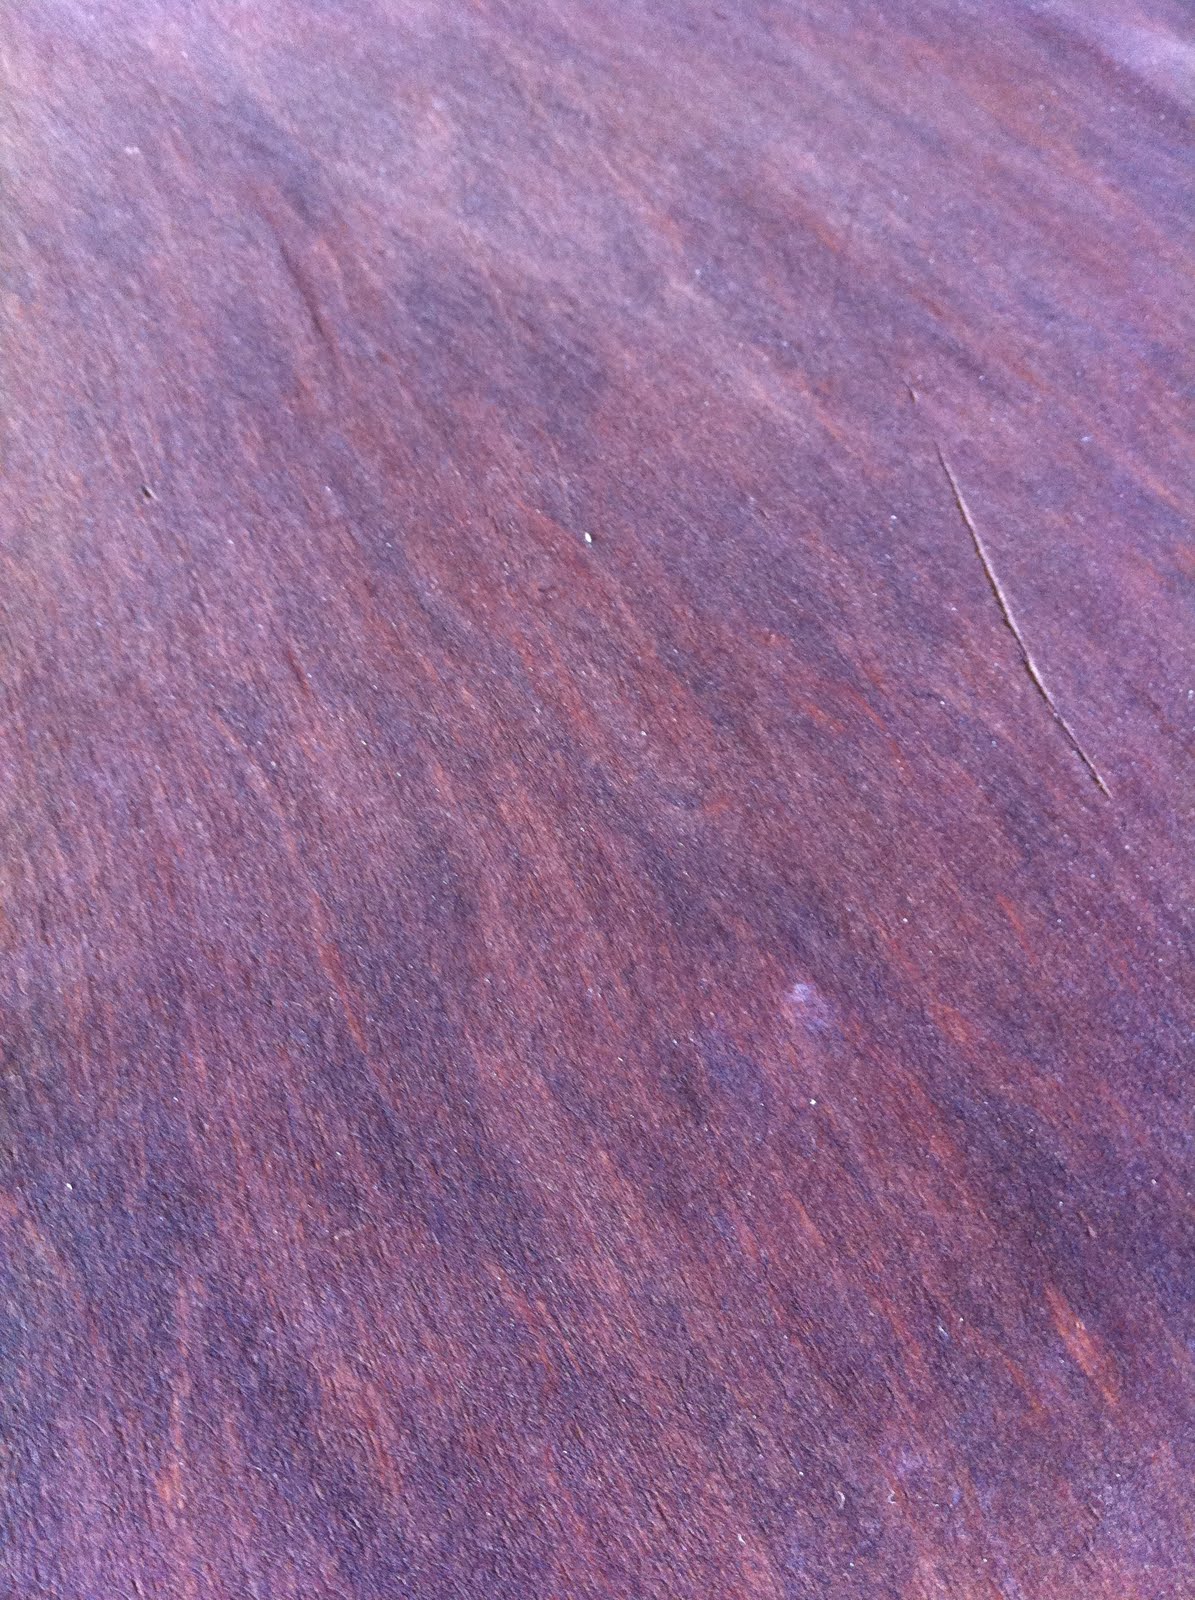
Here is the underside of the top with stain.


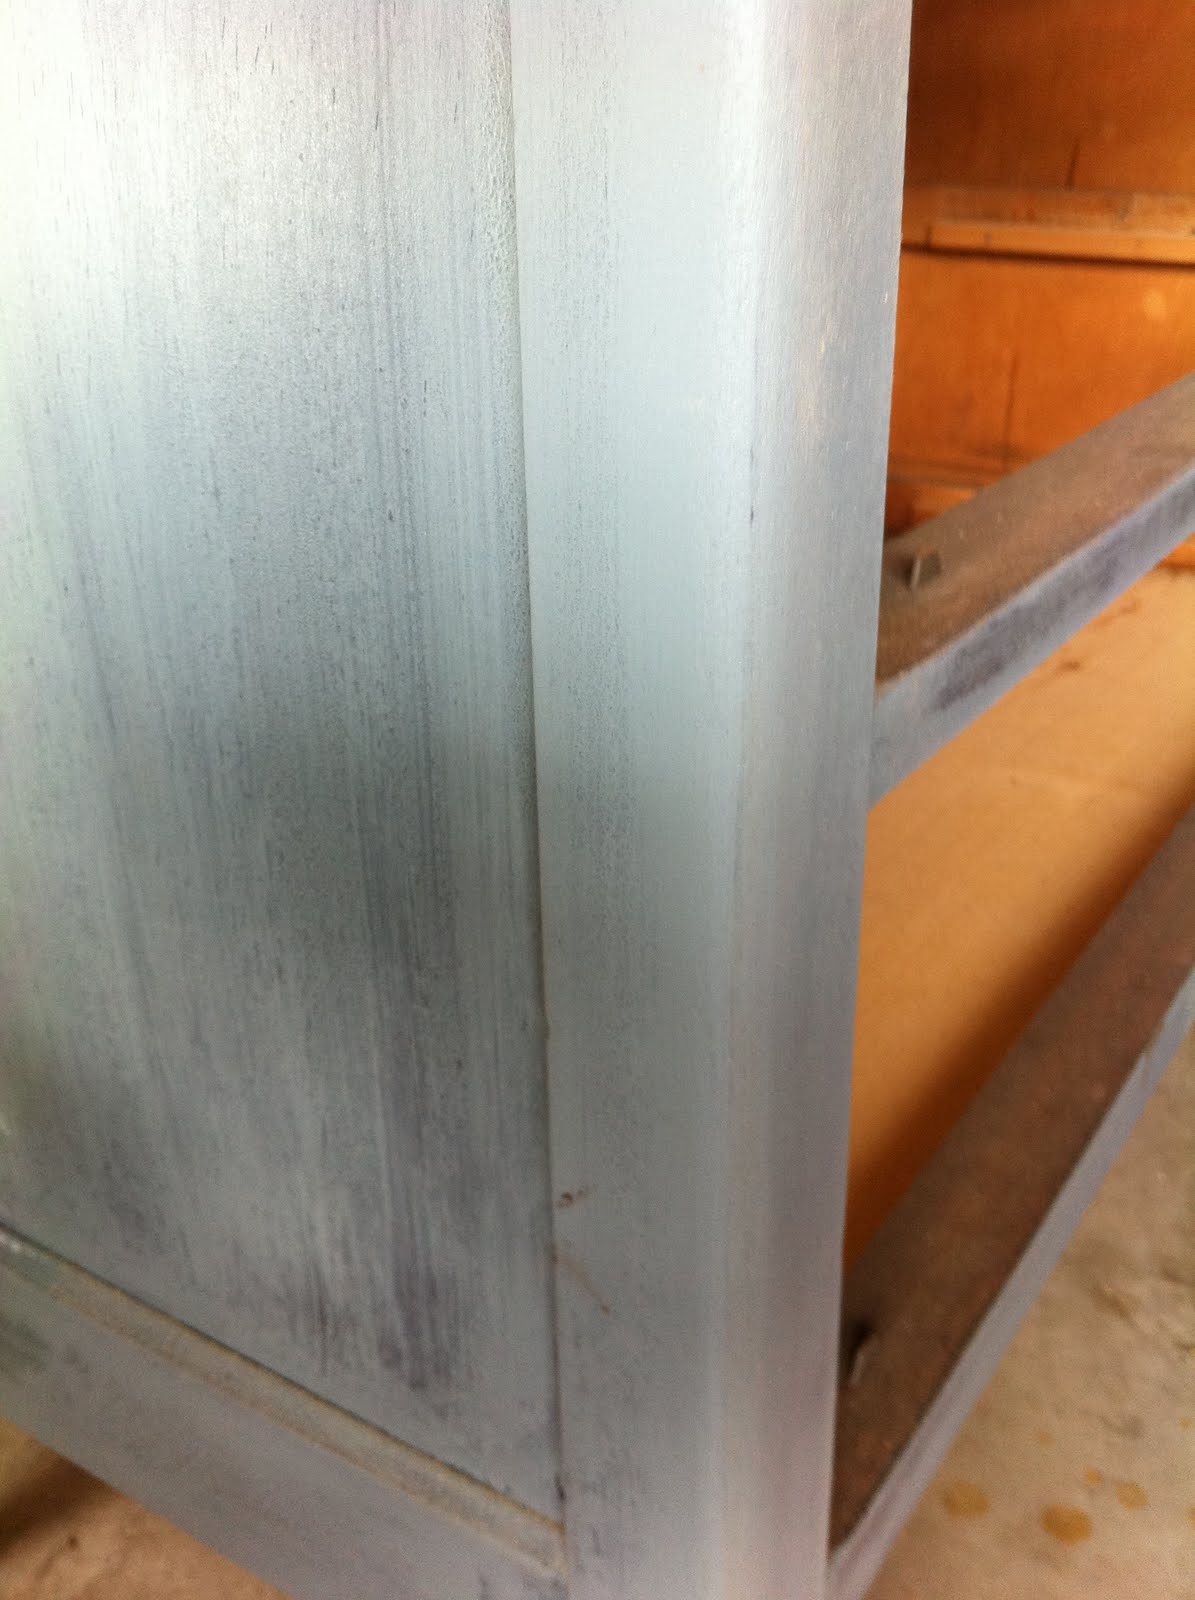
Instead of using poly on the top, I used the wax.  You can tell what a difference one coat of wax on the right does to the old wood.


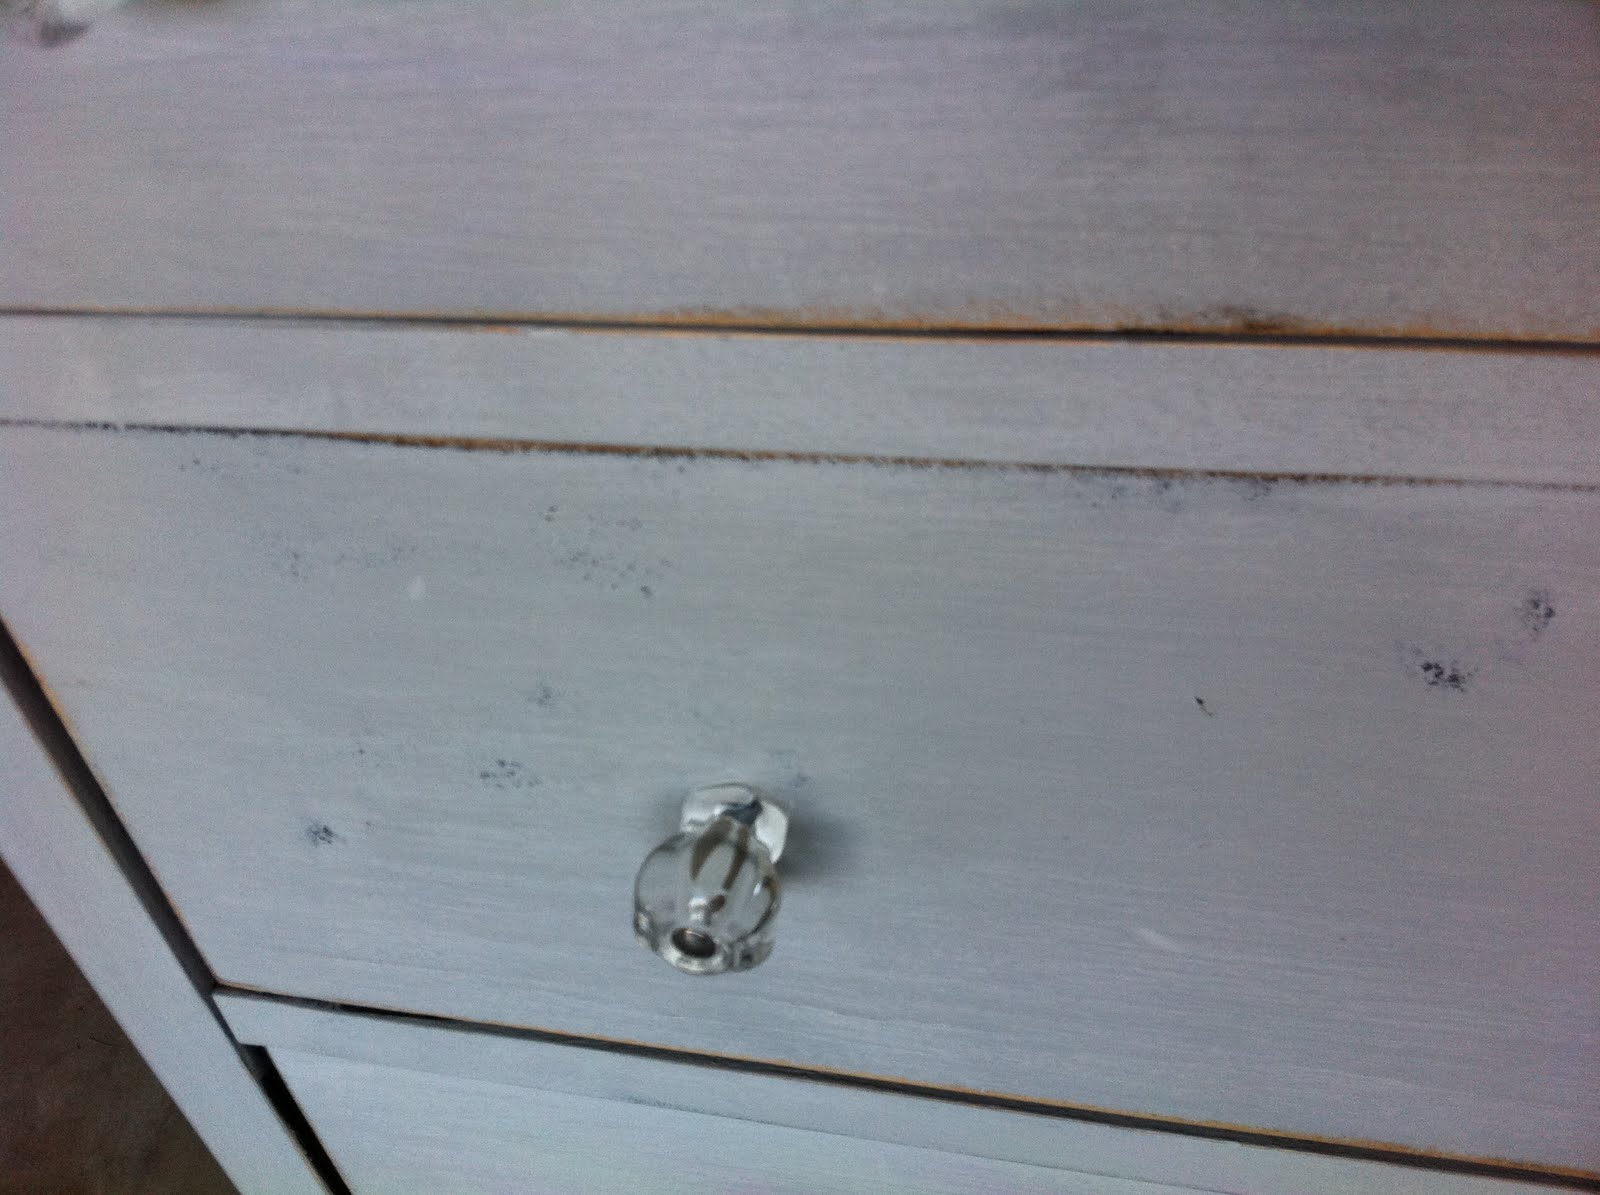
I don't know how well you can see the picture below, but the right side has wax.  Without the wax, the Paris Grey almost looks white.  When you apply the wax, the magic happens.  The wax makes the whole reason for spending the money on the paint.  I had what they refer to as the AH HA moment.


Here is the waxed and hand buffed piece.  If you don't buy the wax, you just won't understand the hype over this product.  And yes, I will be trying the wax with regular paint to see if I can get a similar finish.


Those little dark spots didn't even show up until I added the wax.  It adds so much life, character and distressed charm.  Doesn't it look like it was supposed to be that way from the beginning?


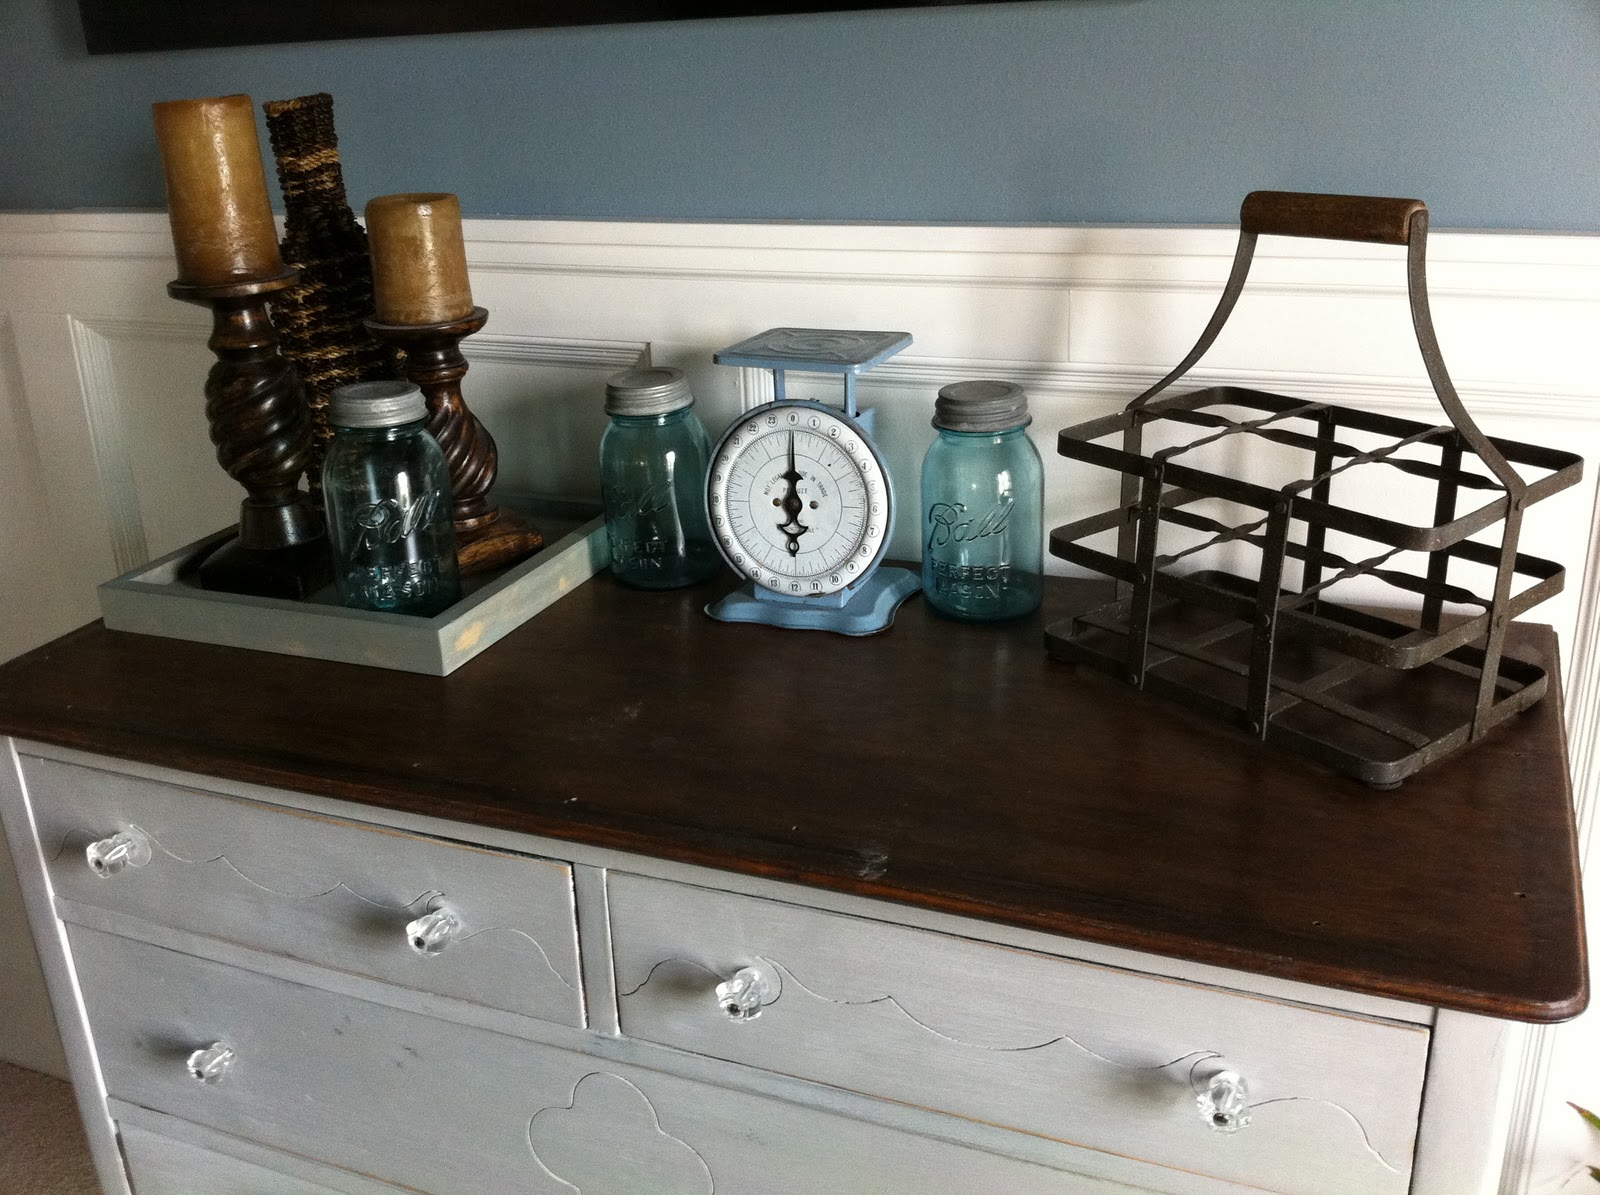
I really liked how the knobby knees on the legs turned out with the finish.


See how smooth and shiny the finished piece is?  And yes, it feels just as smooth as it looks.  I LOVE the fact you don't have to wait for it to dry like you do with poly and you don't have to do three coats to get to this point.  This was just one coat.


Sorry for my dusty finger prints on the top.  It sure makes you dusty when you sand the paint.

In my opinion, the expense of the paint AND the WAX may be worth it if I am not able to replicate a similar look with regular paint.  However, I have a ton of the can left over to do many more projects.  I'm going to give it a smiley face :) for the performance of the product and a frown face for the price :(

UPDATE:  After I attempted to try to replicate the look with regular paint, I have a few things to add.  1)  Coverage.  Maybe there is a reason it costs $35 a can.  It covers much more.  2)  The chalk paint sanded smoother and you had more control over the sanding.  With regular paint, it could have had a section where the enamel bonded together.  If you try to sand, it may take more (or none in one section) than you want. 

You can recreate the look, but you will need more paint and it isn't as easy as the chalk paint.  Okay, I'm a fan now.  I'm already looking for more colors and the dark wax.  But first, I ordered something called Milk Paint.  I should get that shipped this week and I'll review.

Linking up with: